I’m delighted to share this guest article by Kim Lordier with you. Kim wrote to say she was enjoying the Pastel Today newsletter and offered to write this post all about how she can create pastel sticks from the bits and pieces of pastel she saves along her pastel-painting journey.
So over to Kim!
*****
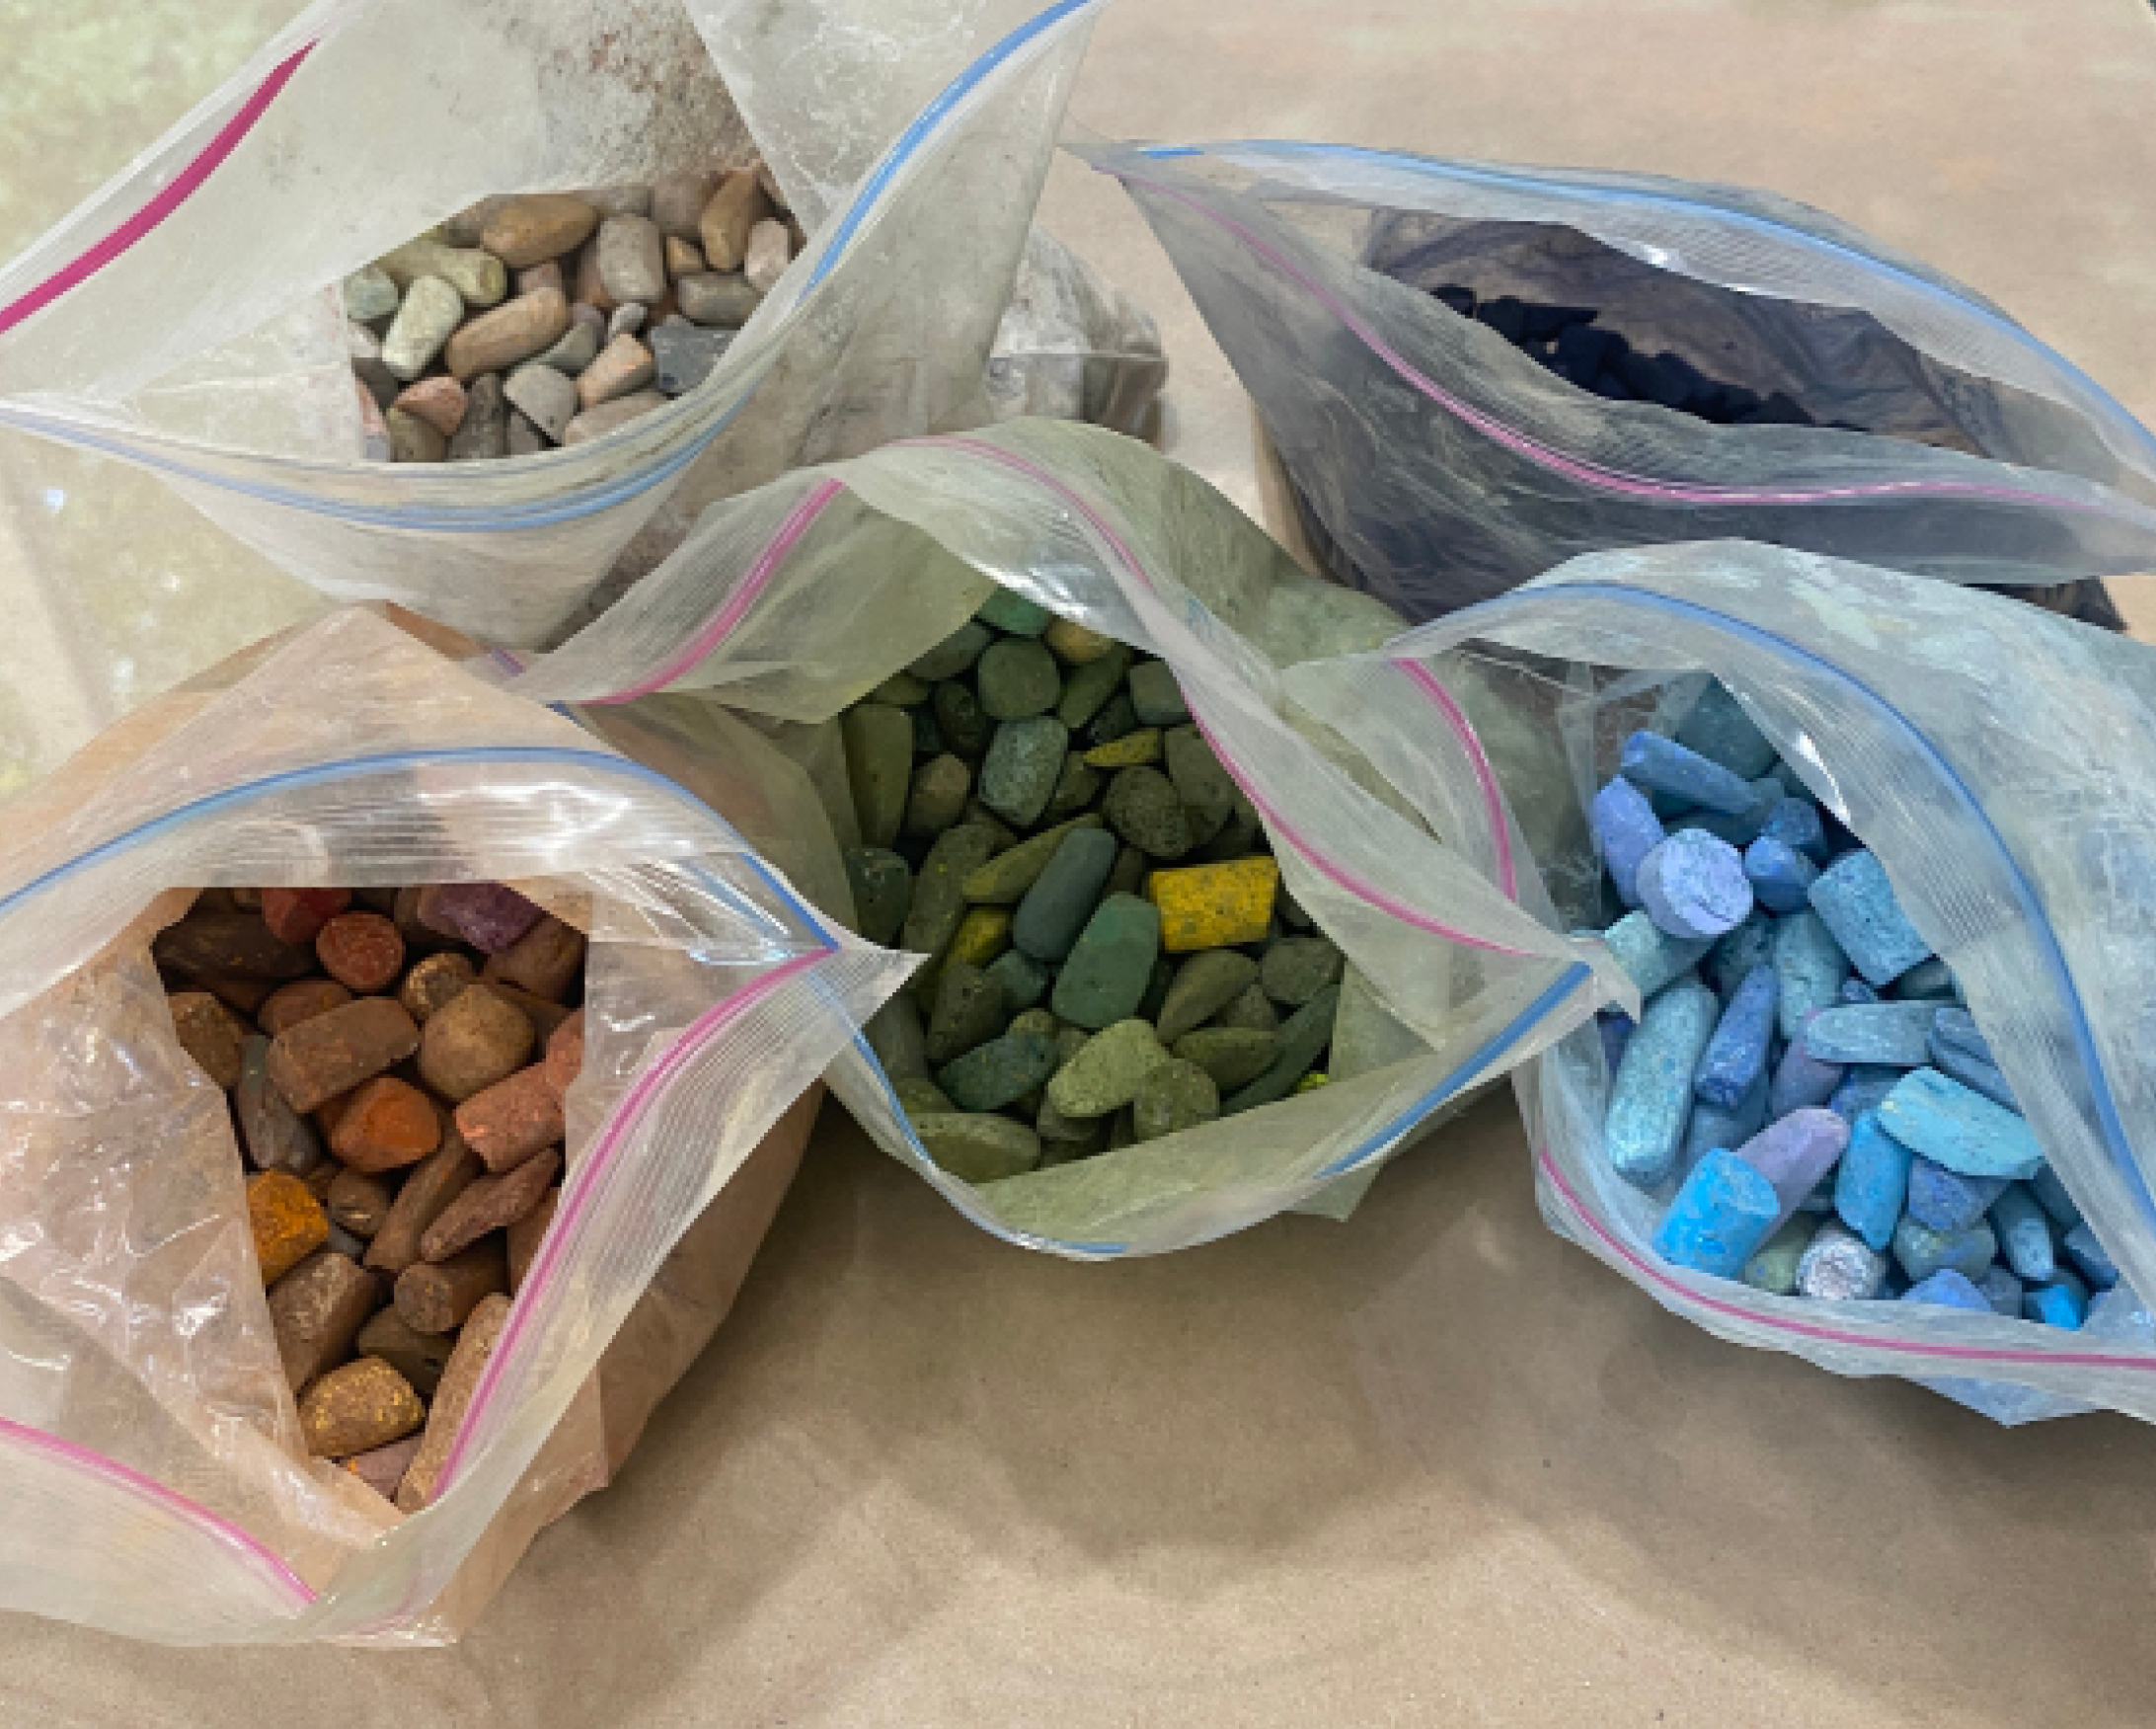
Pastels have been my primary medium for over 40 years. I collect the bits and pieces that break off, wear down, or fall on the floor, placing them into sandwich bags separated by general colour family and value. From there, I create pastel sticks.
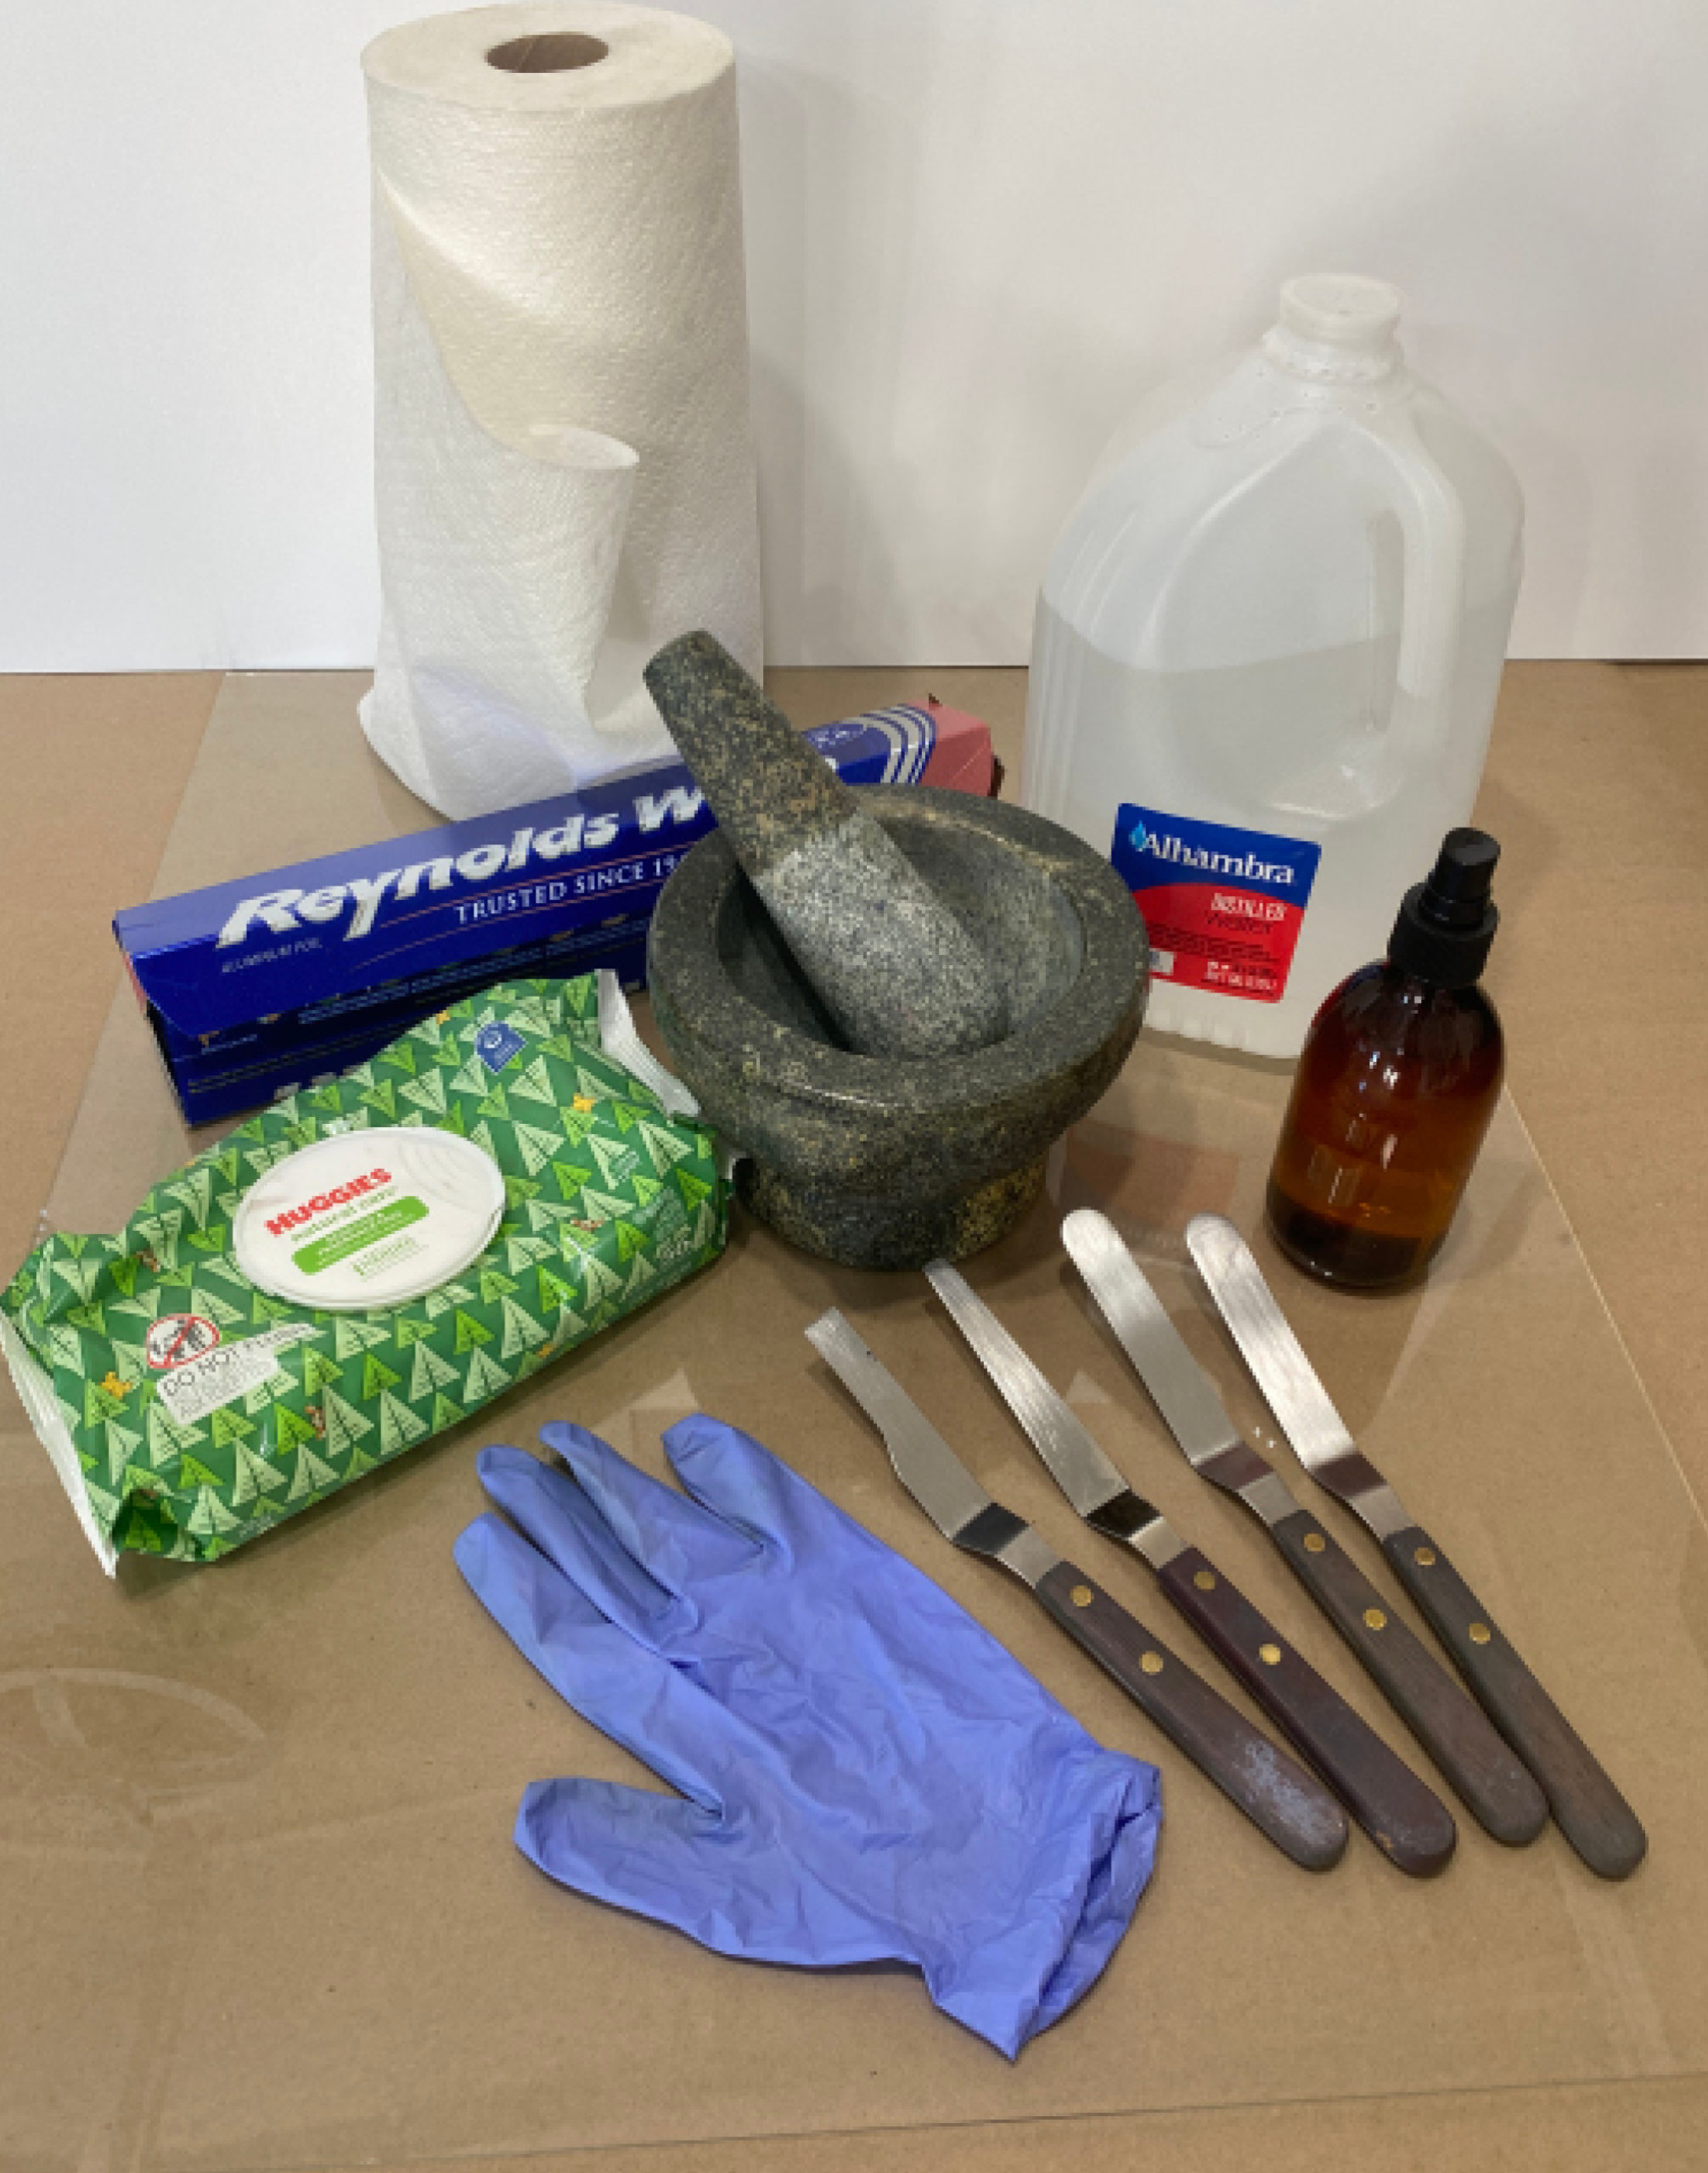
These are the supplies you’ll need to create pastel sticks:
- Pastel bits and pieces
- A piece of regular picture glass approximately 16×20 in
- Distilled water
- Mortar and Pestle
- 4 palette knives
- Tablespoon
- Water bottle
- Tinfoil
- Baby wipes
- Surgical gloves
Tear off a piece of tinfoil approximately 9×12 in and lay a piece of paper towel on top of it. This will be the place you set the wet pastel stick to dry. Make sure it’s on a flat surface. Keep it close to your working area.
Place the glass on your working surface in front of you.
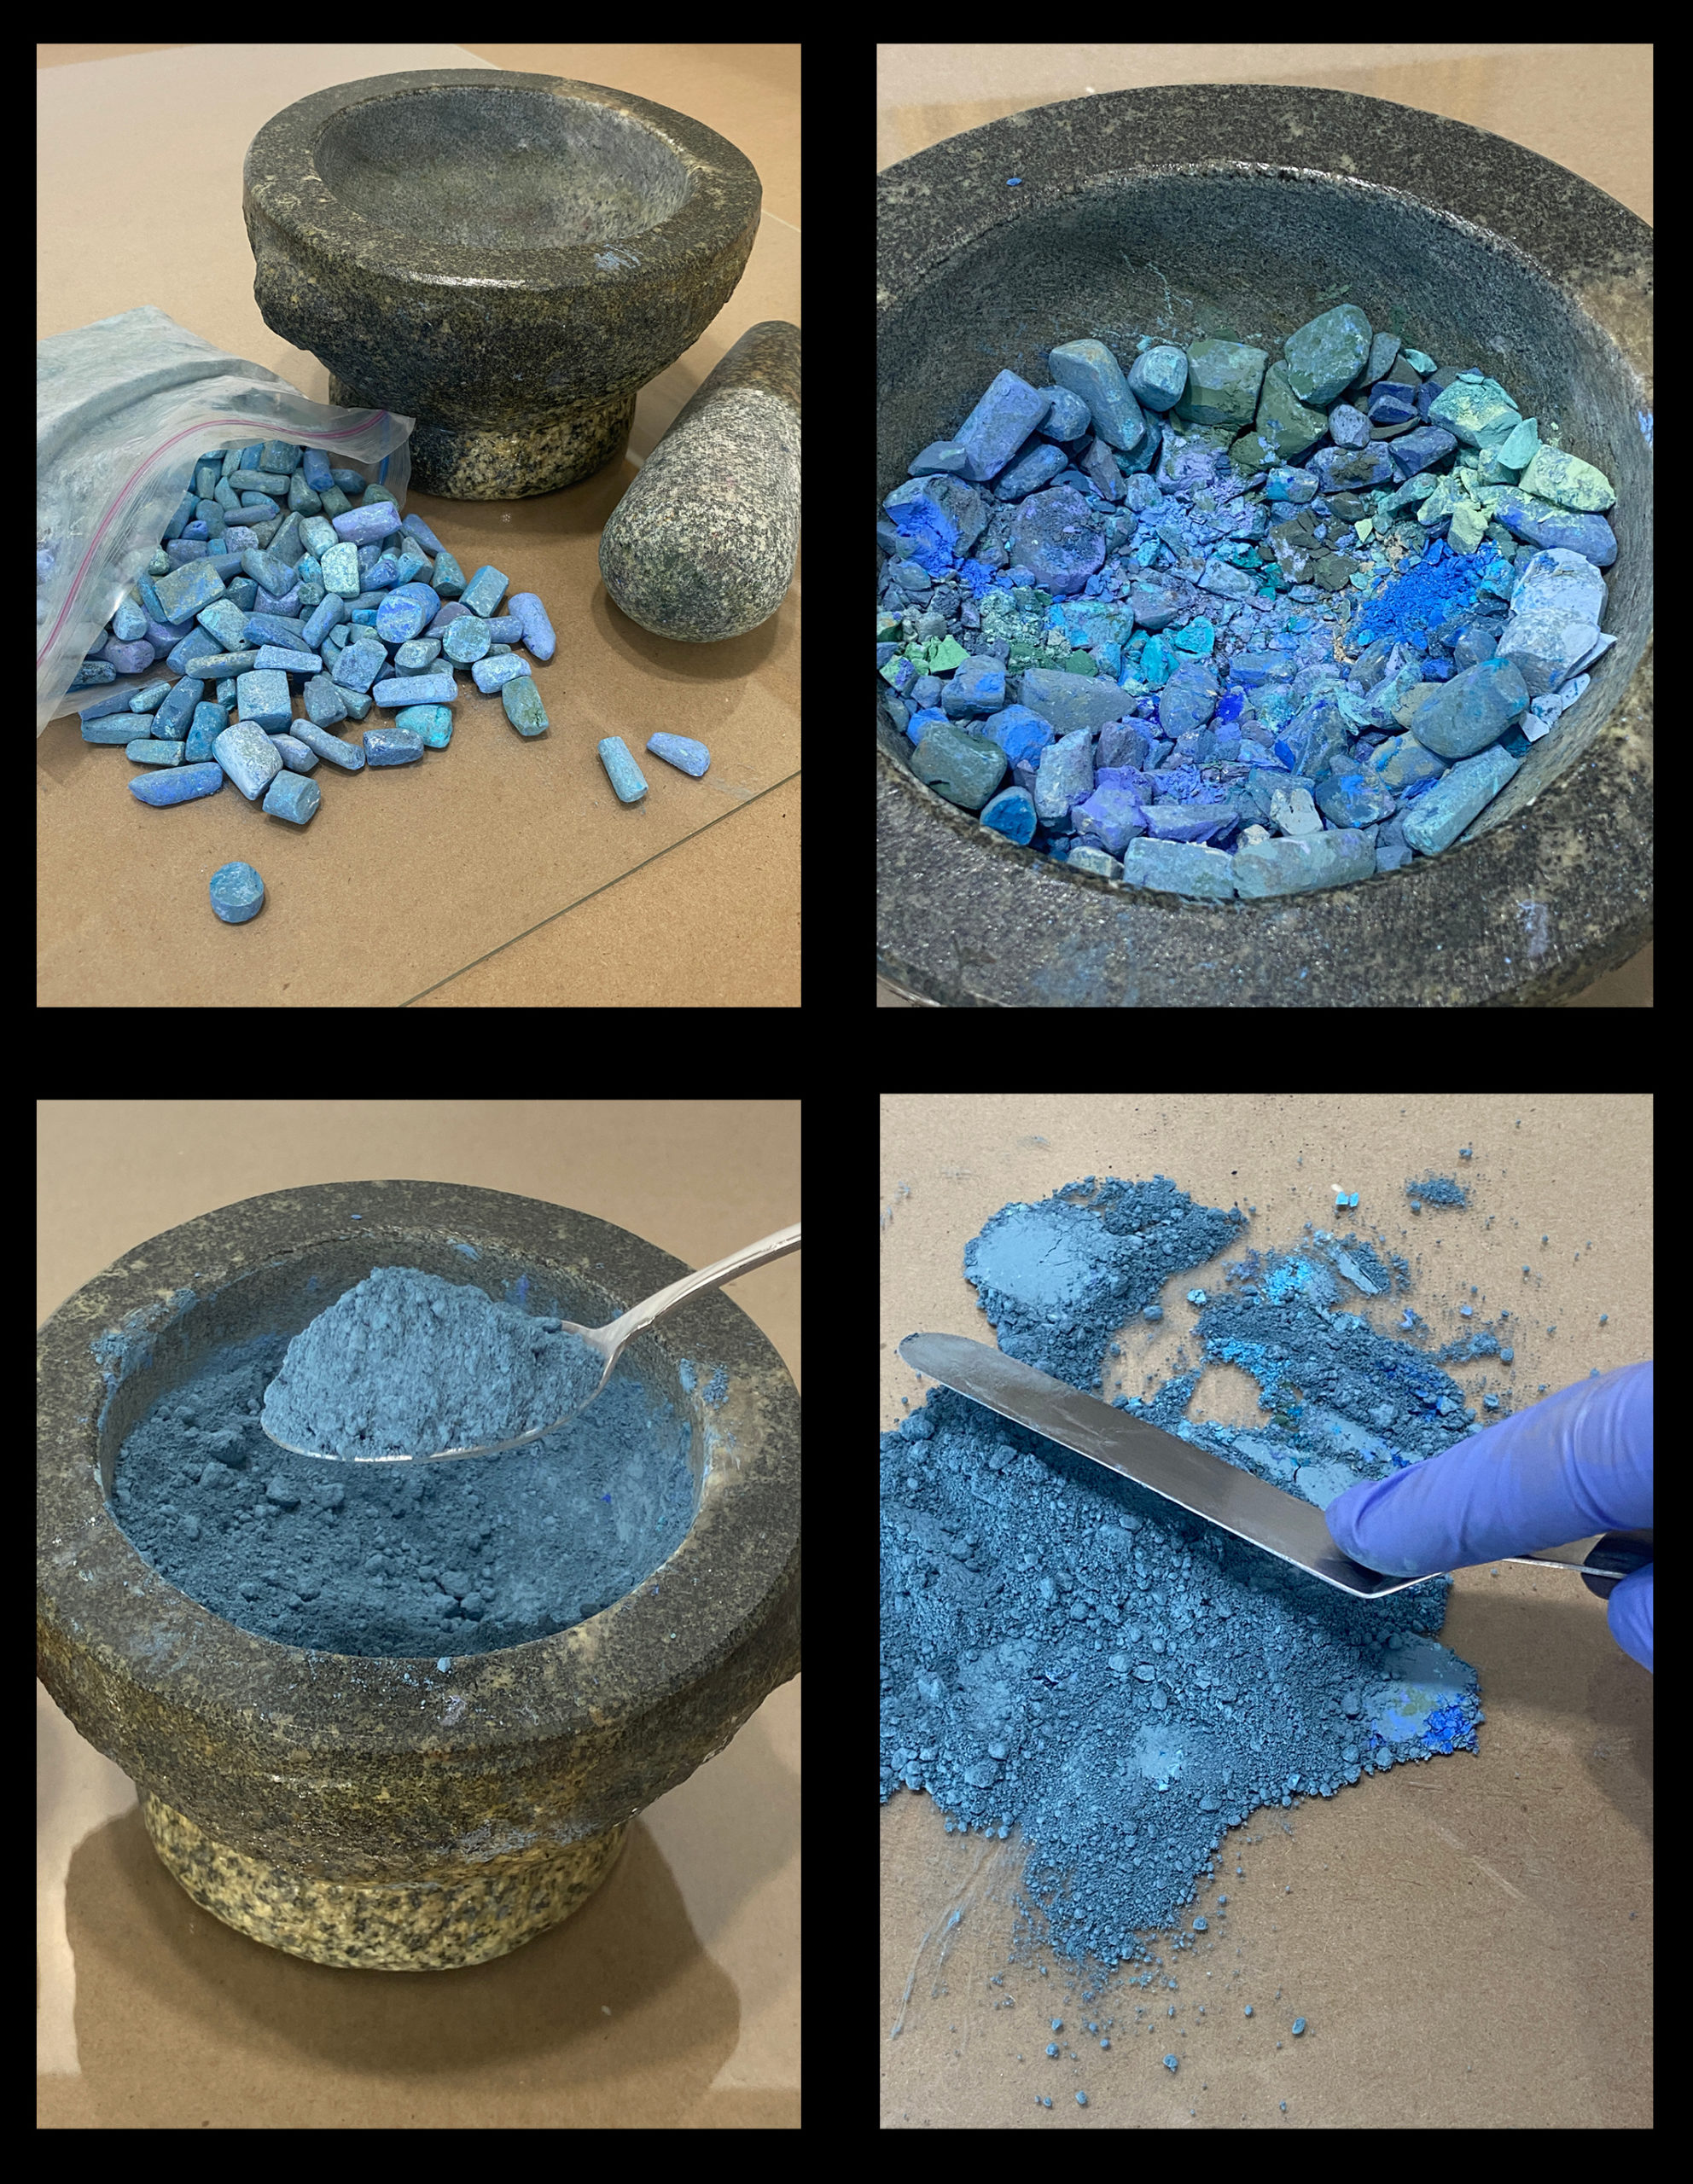
With gloves on, take a handful of your bits and pieces and place them in the mortar. Grind them with the pestle into dust. (If you don’t have a mortar and pestle, you can gently crush the bits directly onto your glass surface or in a plastic bag). Scoop out approximately 2 heaping tablespoons full and empty them on the glass in front of you. Take one of the wide palette knives and continue to crush the little bits that didn’t get smashed in the bowl.
Slowly add distilled water to make a pastel paste the consistency of a thick pudding. Occasionally spray the paste to keep the consistency the same, as the paste will start to dry.

Take two of the palette knives and shape the pastel. Hold one of the palette knives steady, as the backbone of the stick, and use the other palette knife to shape the sides and top. This will take some practice!
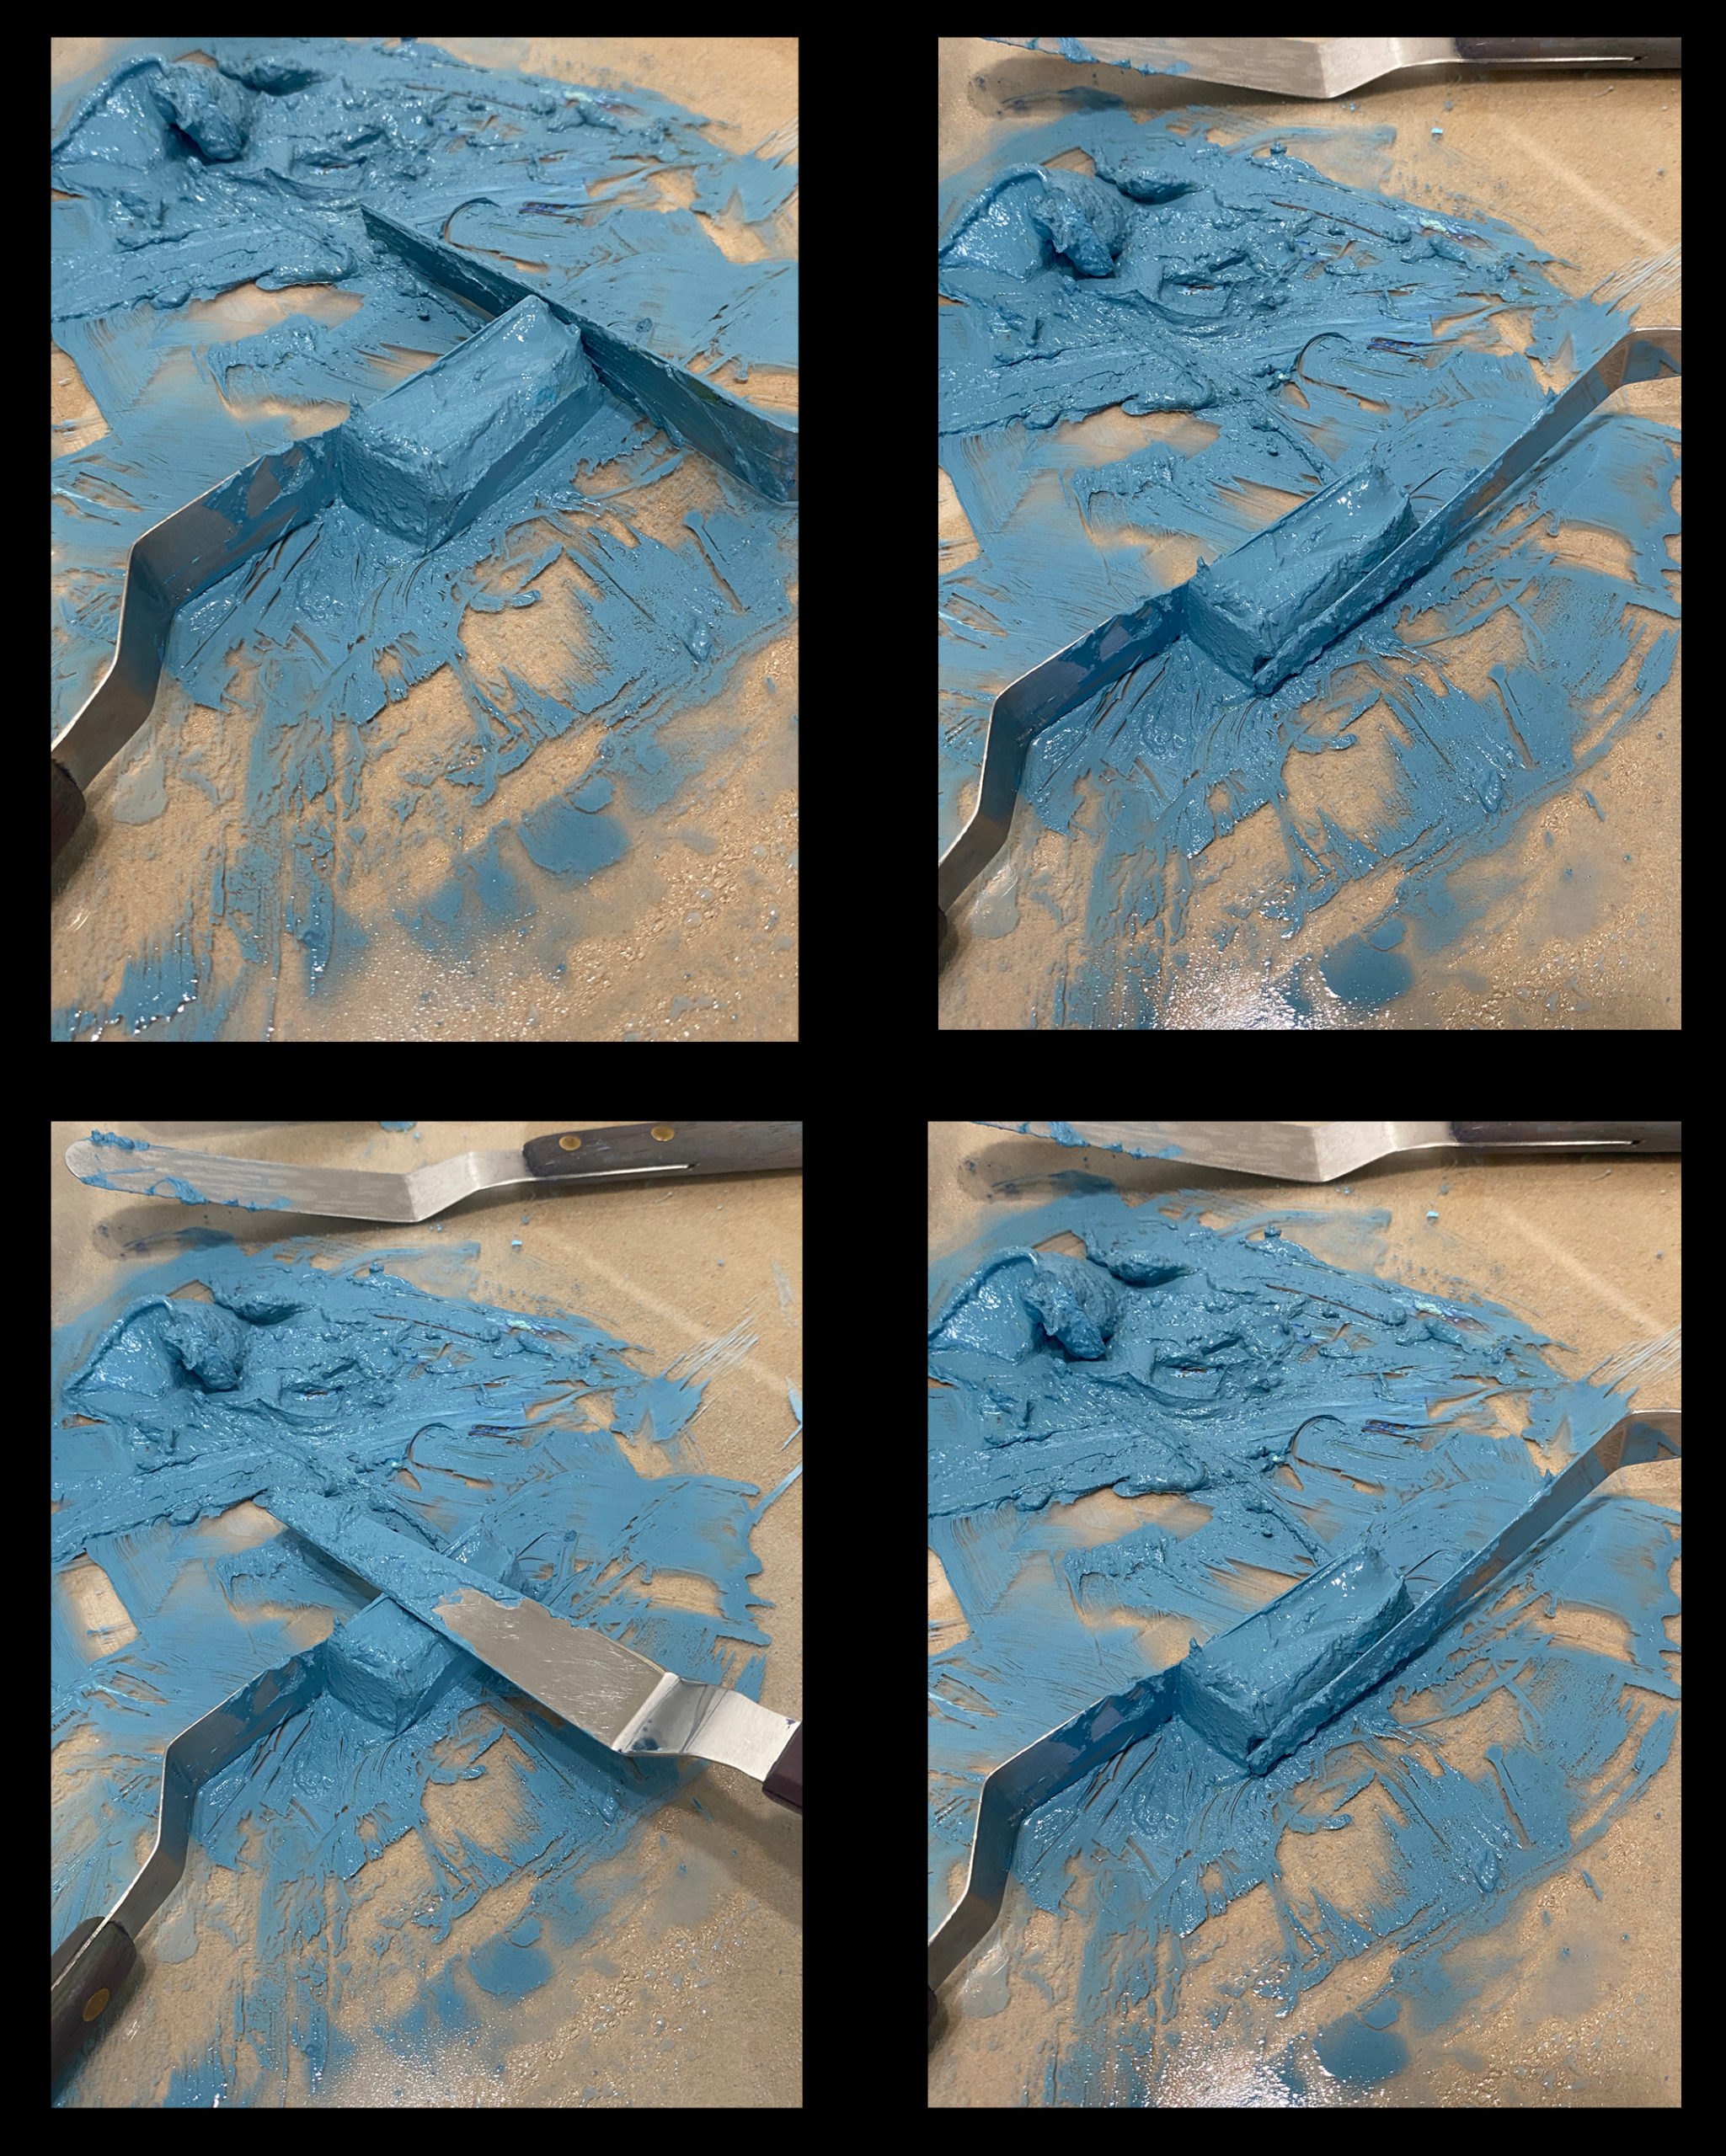
With a clean palette knife, slide it under the wet stick lifting the whole unit to the paper-lined tinfoil. Gently scrape the stick onto the towel. The towel will eventually soak up the water as the pastel stick dries.
Because my collected bits and pieces are in generalized colour families and values, I know that the overall colour of the new stick will be a fairly neutral colour of that particular colour family. For instance, in the photo that shows the average blue bits in the bowl, you will see blues like ultramarine and cobalt. Each side of the colour wheel is represented in the blue-greens and blue-violets. Mixing these will lead to a neutral blue-grey.
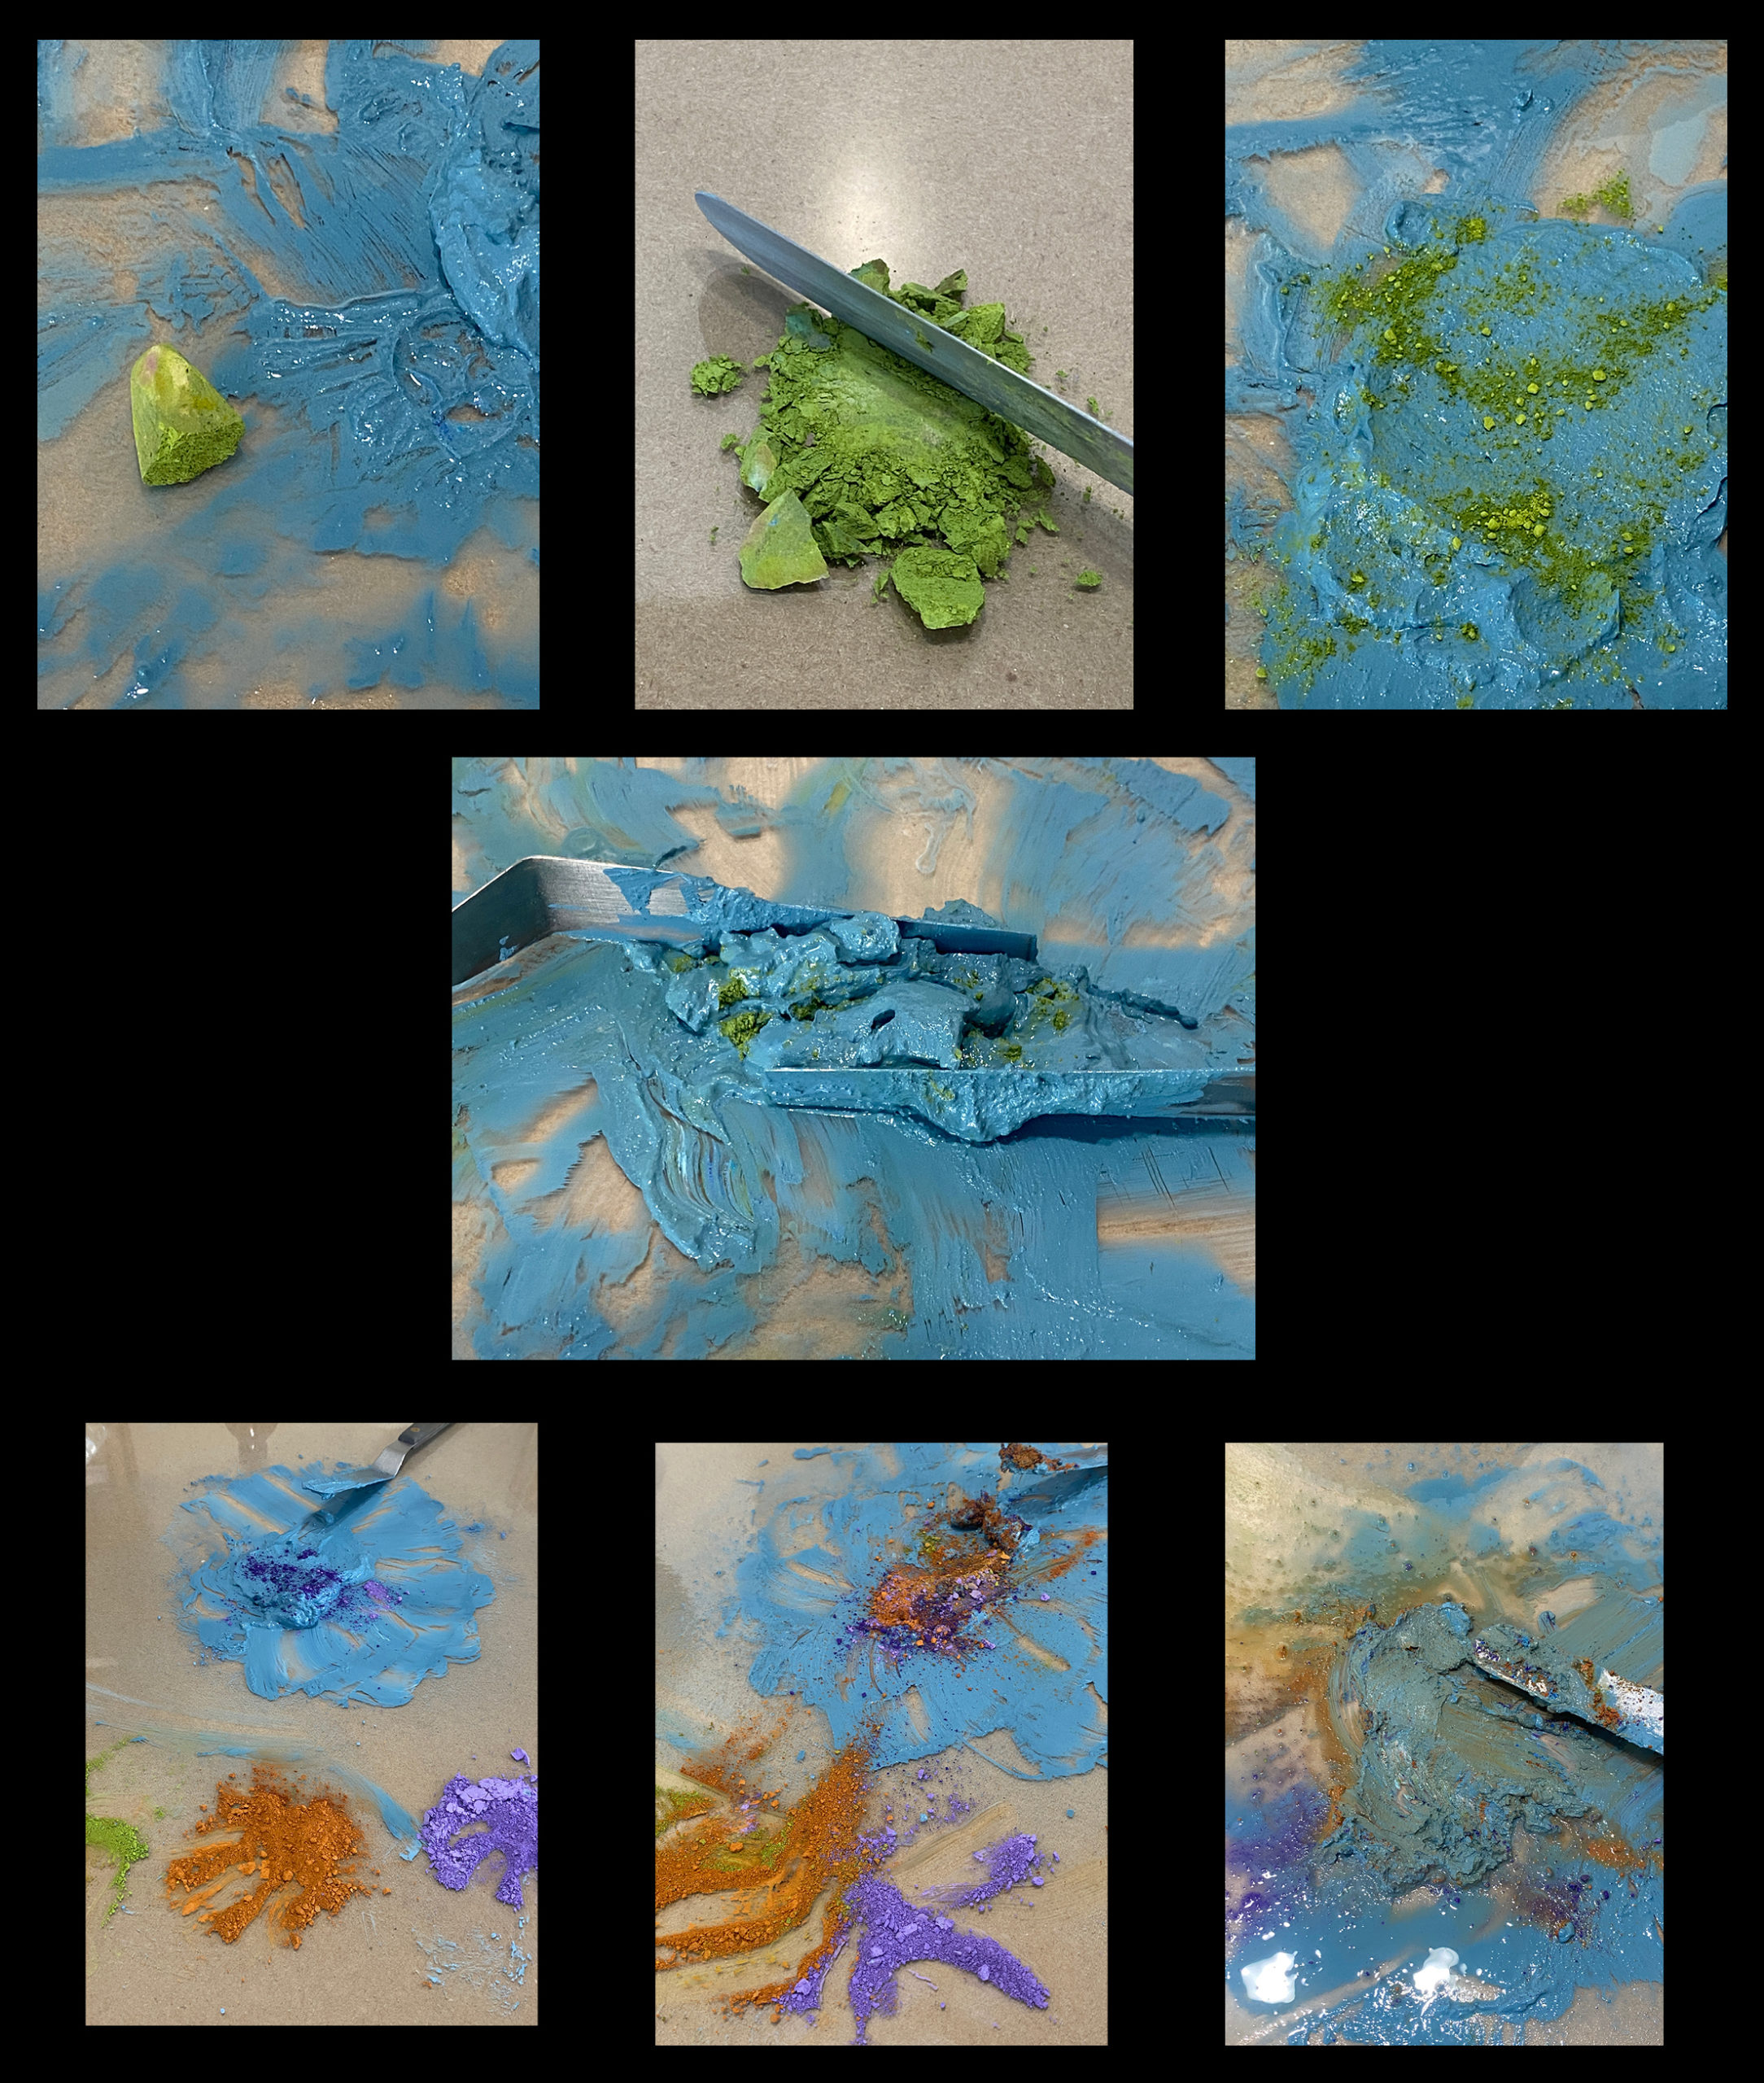
After I create the initial first stick from the paste, I have fun adding a small amount of pure pastel pigment to modify new sticks from that original neutral blue-grey.
In my example, I scooped out some more dust from the bowl and then added a warm yellow-green of similar value. This created a whole new stick of a different colour. I then cleaned that colour from the glass. Next, I chose a burnt orange, a complement to the blue, to make another stick. I like to just sprinkle the dust into the mixture, not completely mixing in the new colour. This way when the stick dries and you paint with it, the mark made will be similar to a paintbrush loaded with a couple of colours at the same time.
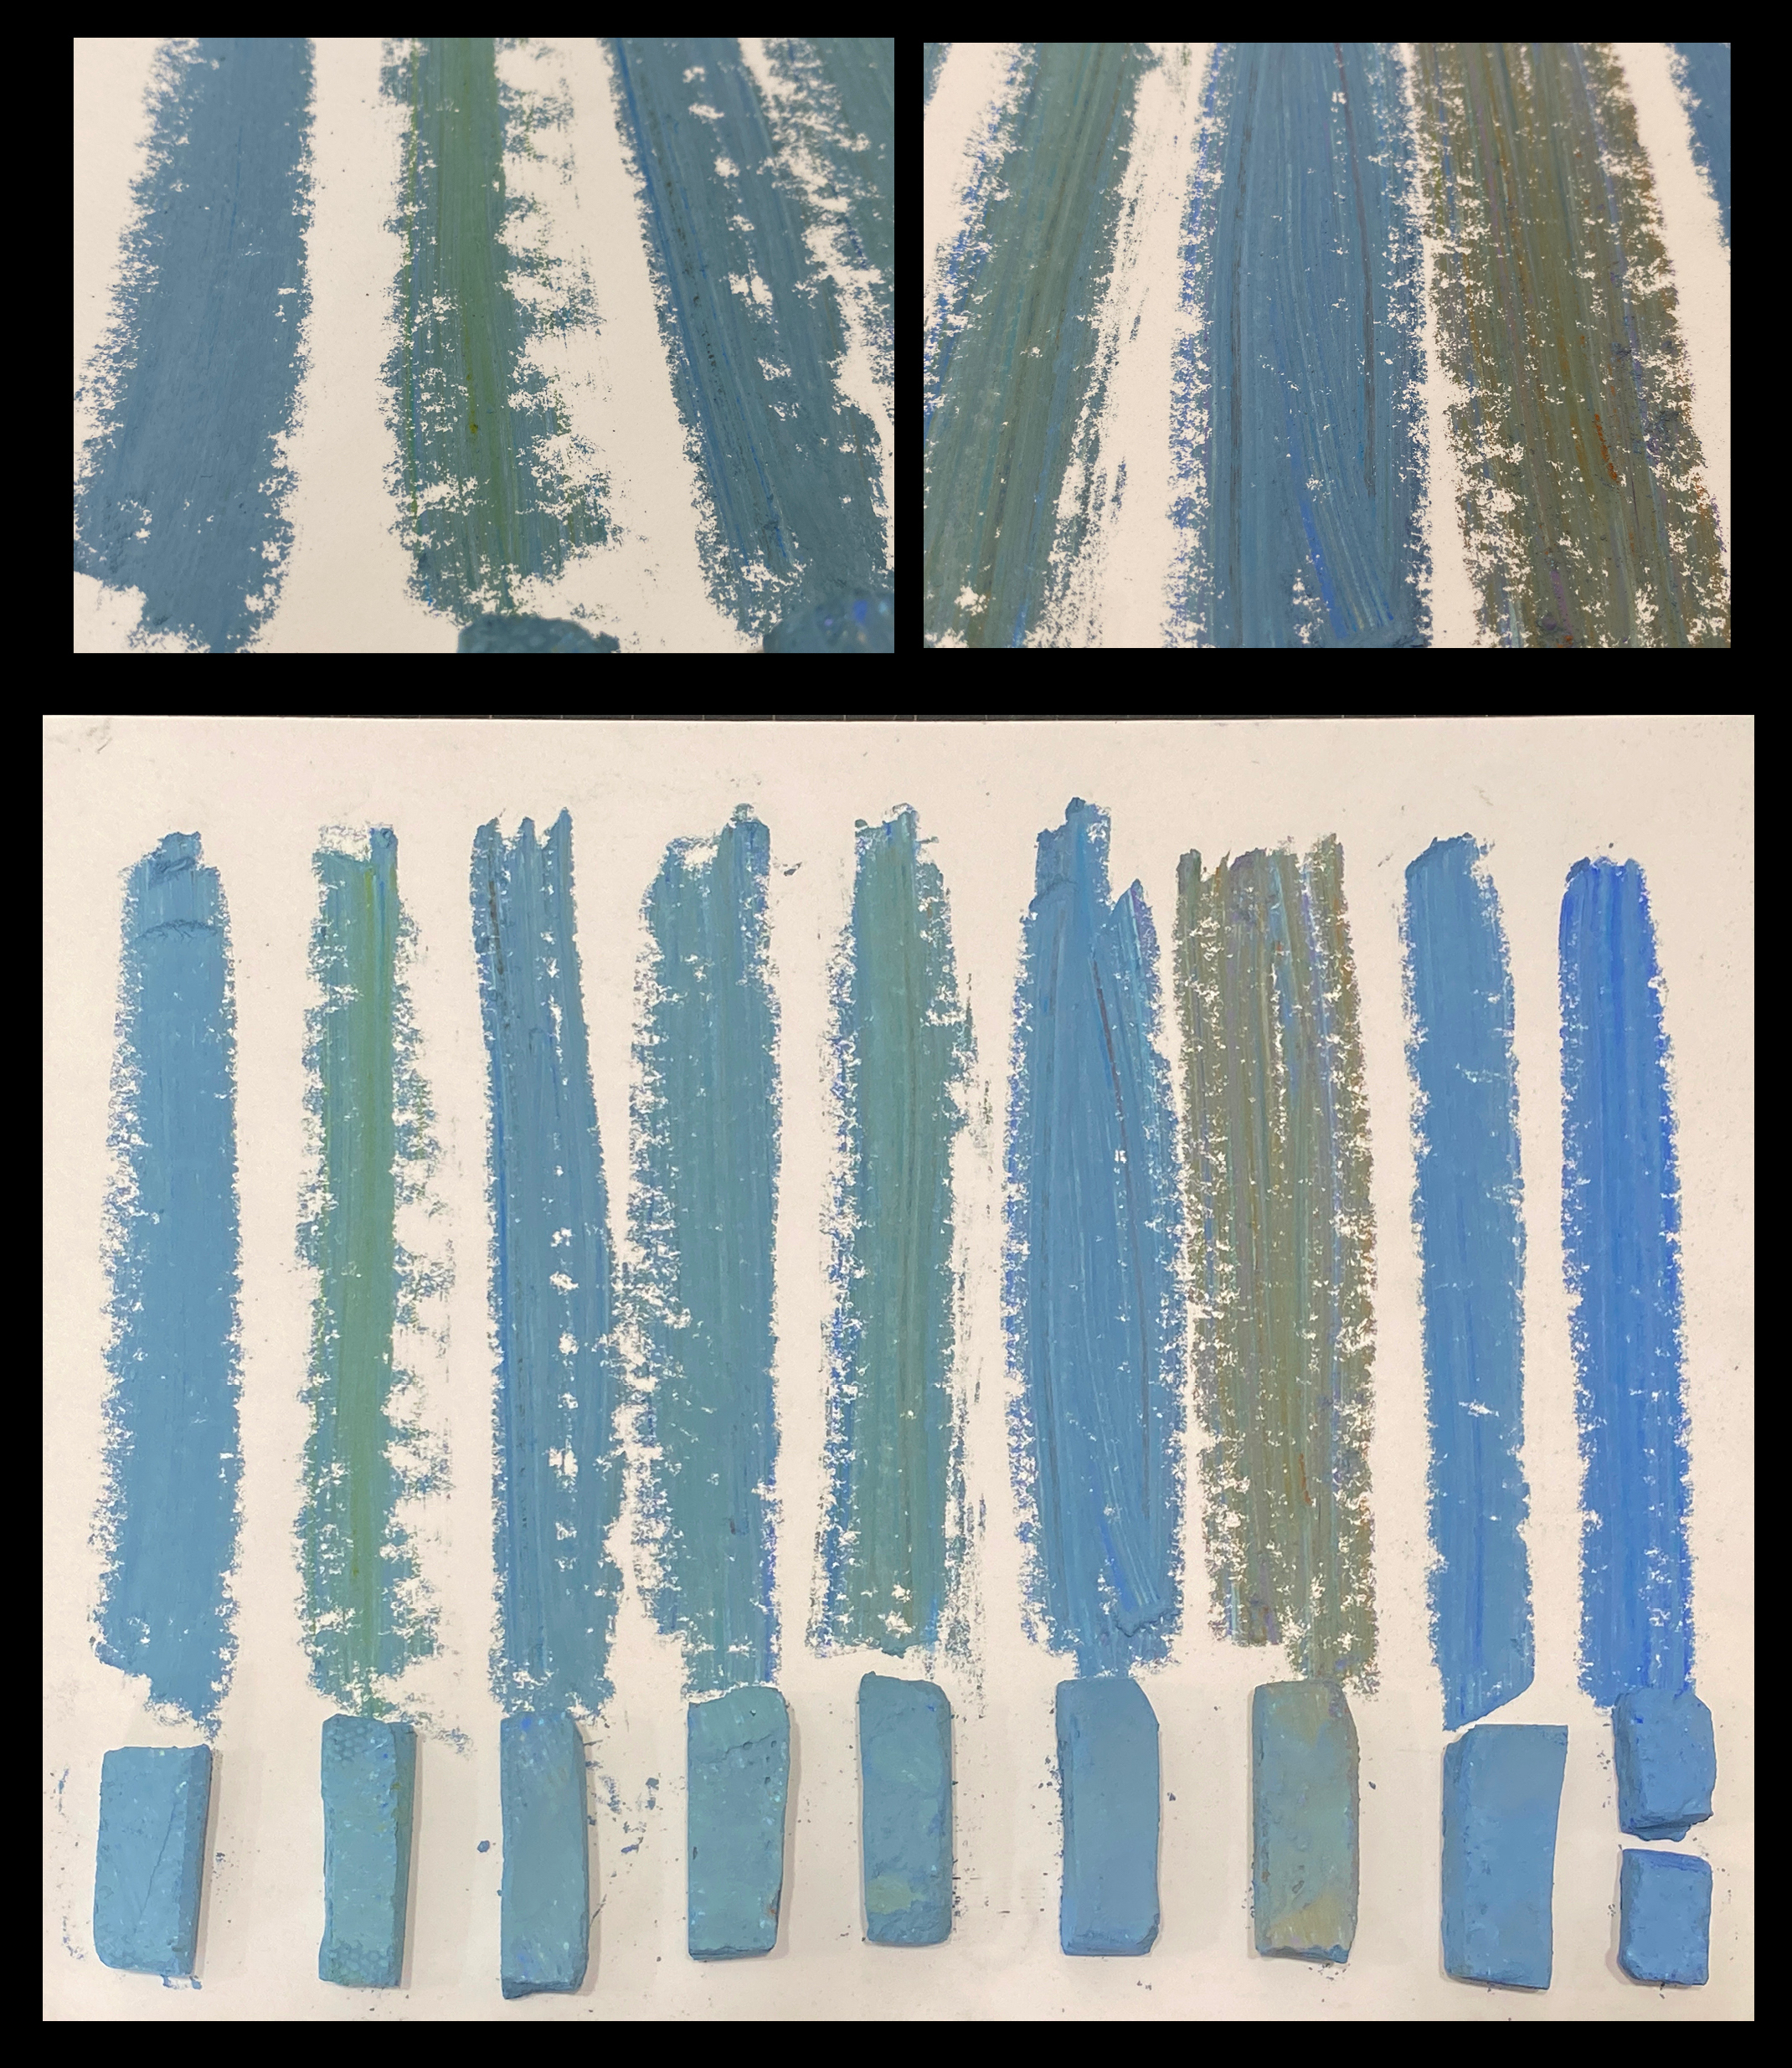
The third to last stick, I mixed all the colours together knowing this particular stick will be quite neutral but that it would have the most variety in the streaks. With the last bit of the original pigment, I brought in a more saturated blue for the final two sticks.
If your studio is warm enough, the sticks should be dry in approximately 24-30 hours. My studio was cold, so I set them in the sun for part of the next day.
Once dry, lightly sand the edges to remove some of the ridges.
That pile of blue bits created nine new pastel sticks to add to my palette. Look closely, you can see the beautiful potential in sliding one of these beauties across your paper. Just like a loaded paintbrush!
Many years ago I had the privilege to learn how to make pastels by hand from Terry Ludwig, of Terry Ludwig Pastels. Still today, every Ludwig pastel is lovingly created by hand! And I continue to use his recipe to create pastel sticks.
~~~~~
Ohhhh Kim, I can hardly wait to try this. Thanks so much for sharing your expertise on how to create pastel sticks from all our leftover bits and pieces. Especially valuable are all the illustrated steps. Love the idea of creating subtly different colours from one batch of crushed pastel dust.
And now we’d like to hear if you give this a try. Be sure to leave us a comment on the blog!
________________________________________________________________________
Do you have a tip to share?
Do you have some time-saving tips, a cool tool to talk about, or a story to tell? Then I’d love to hear about it. Email me at [email protected]
And that’s it for this time!
Gail


Why distilled water? Is using tap water OK?
Distilled water is steam from boiling water that’s been cooled and returned to its liquid state. About 98% of the minerals, pollutants and chemicals found in tap water are basically steamed out. Tap water, in the United States, has chlorine and fluoride added. These chemicals can react negatively with the binders that hold the pastel pigment together. I am NOT a chemist. This is just what I’ve learned over the years.