Today is all about how to paint hair.
Whoo hoo, it’s Friday which means it’s the ONE question day here on Pastel Today.
If you’re new here, this means I ask one of our Advisory Board members a question….and it’s the same question each week until we run through the whole Board. (You can see the answers to the previous question by clicking HERE.)
Today, we start the ball rolling with a NEW question and that question is:
Do you have a favourite pastel hack—a clever trick or shortcut that you’ve introduced into your process?
Michele Ashby’s pastel hack is all about how to paint hair. And who better to share this info as she herself paints a wide variety of hair types, styles, and colours. Her wish is to show you, through the hacks that she’s picked up along the way, that painting hair isn’t as difficult as it may first appear. Wait until you see how she paints hair. You’re going to get a lot of info here.
So let’s get cracking!
“From straight to curly and everything in between, from black to grey and a rainbow of colours, I’ve found it best to leave painting hair until last. This ensures the completion (other than tiny touches) of the face, ears, and neck areas before committing to starting on the hair.
I guess this works in the context of a portrait particularly because hair sits on top of the head so it would be natural to work on it after the face. If you think about your painting in terms of layers then this makes perfect sense.
I use mainly pastel pencils but also pastel sticks, with my surface of choice being Clairefontaine Pastelmat. I enjoy working with the anthracite colour for my style. It’s a dark grey and works well as it works as another shade in my dark palette.
Here are four examples of portraits I’ve drawn or painted and the techniques I’ve used to create the illusion of hair.”
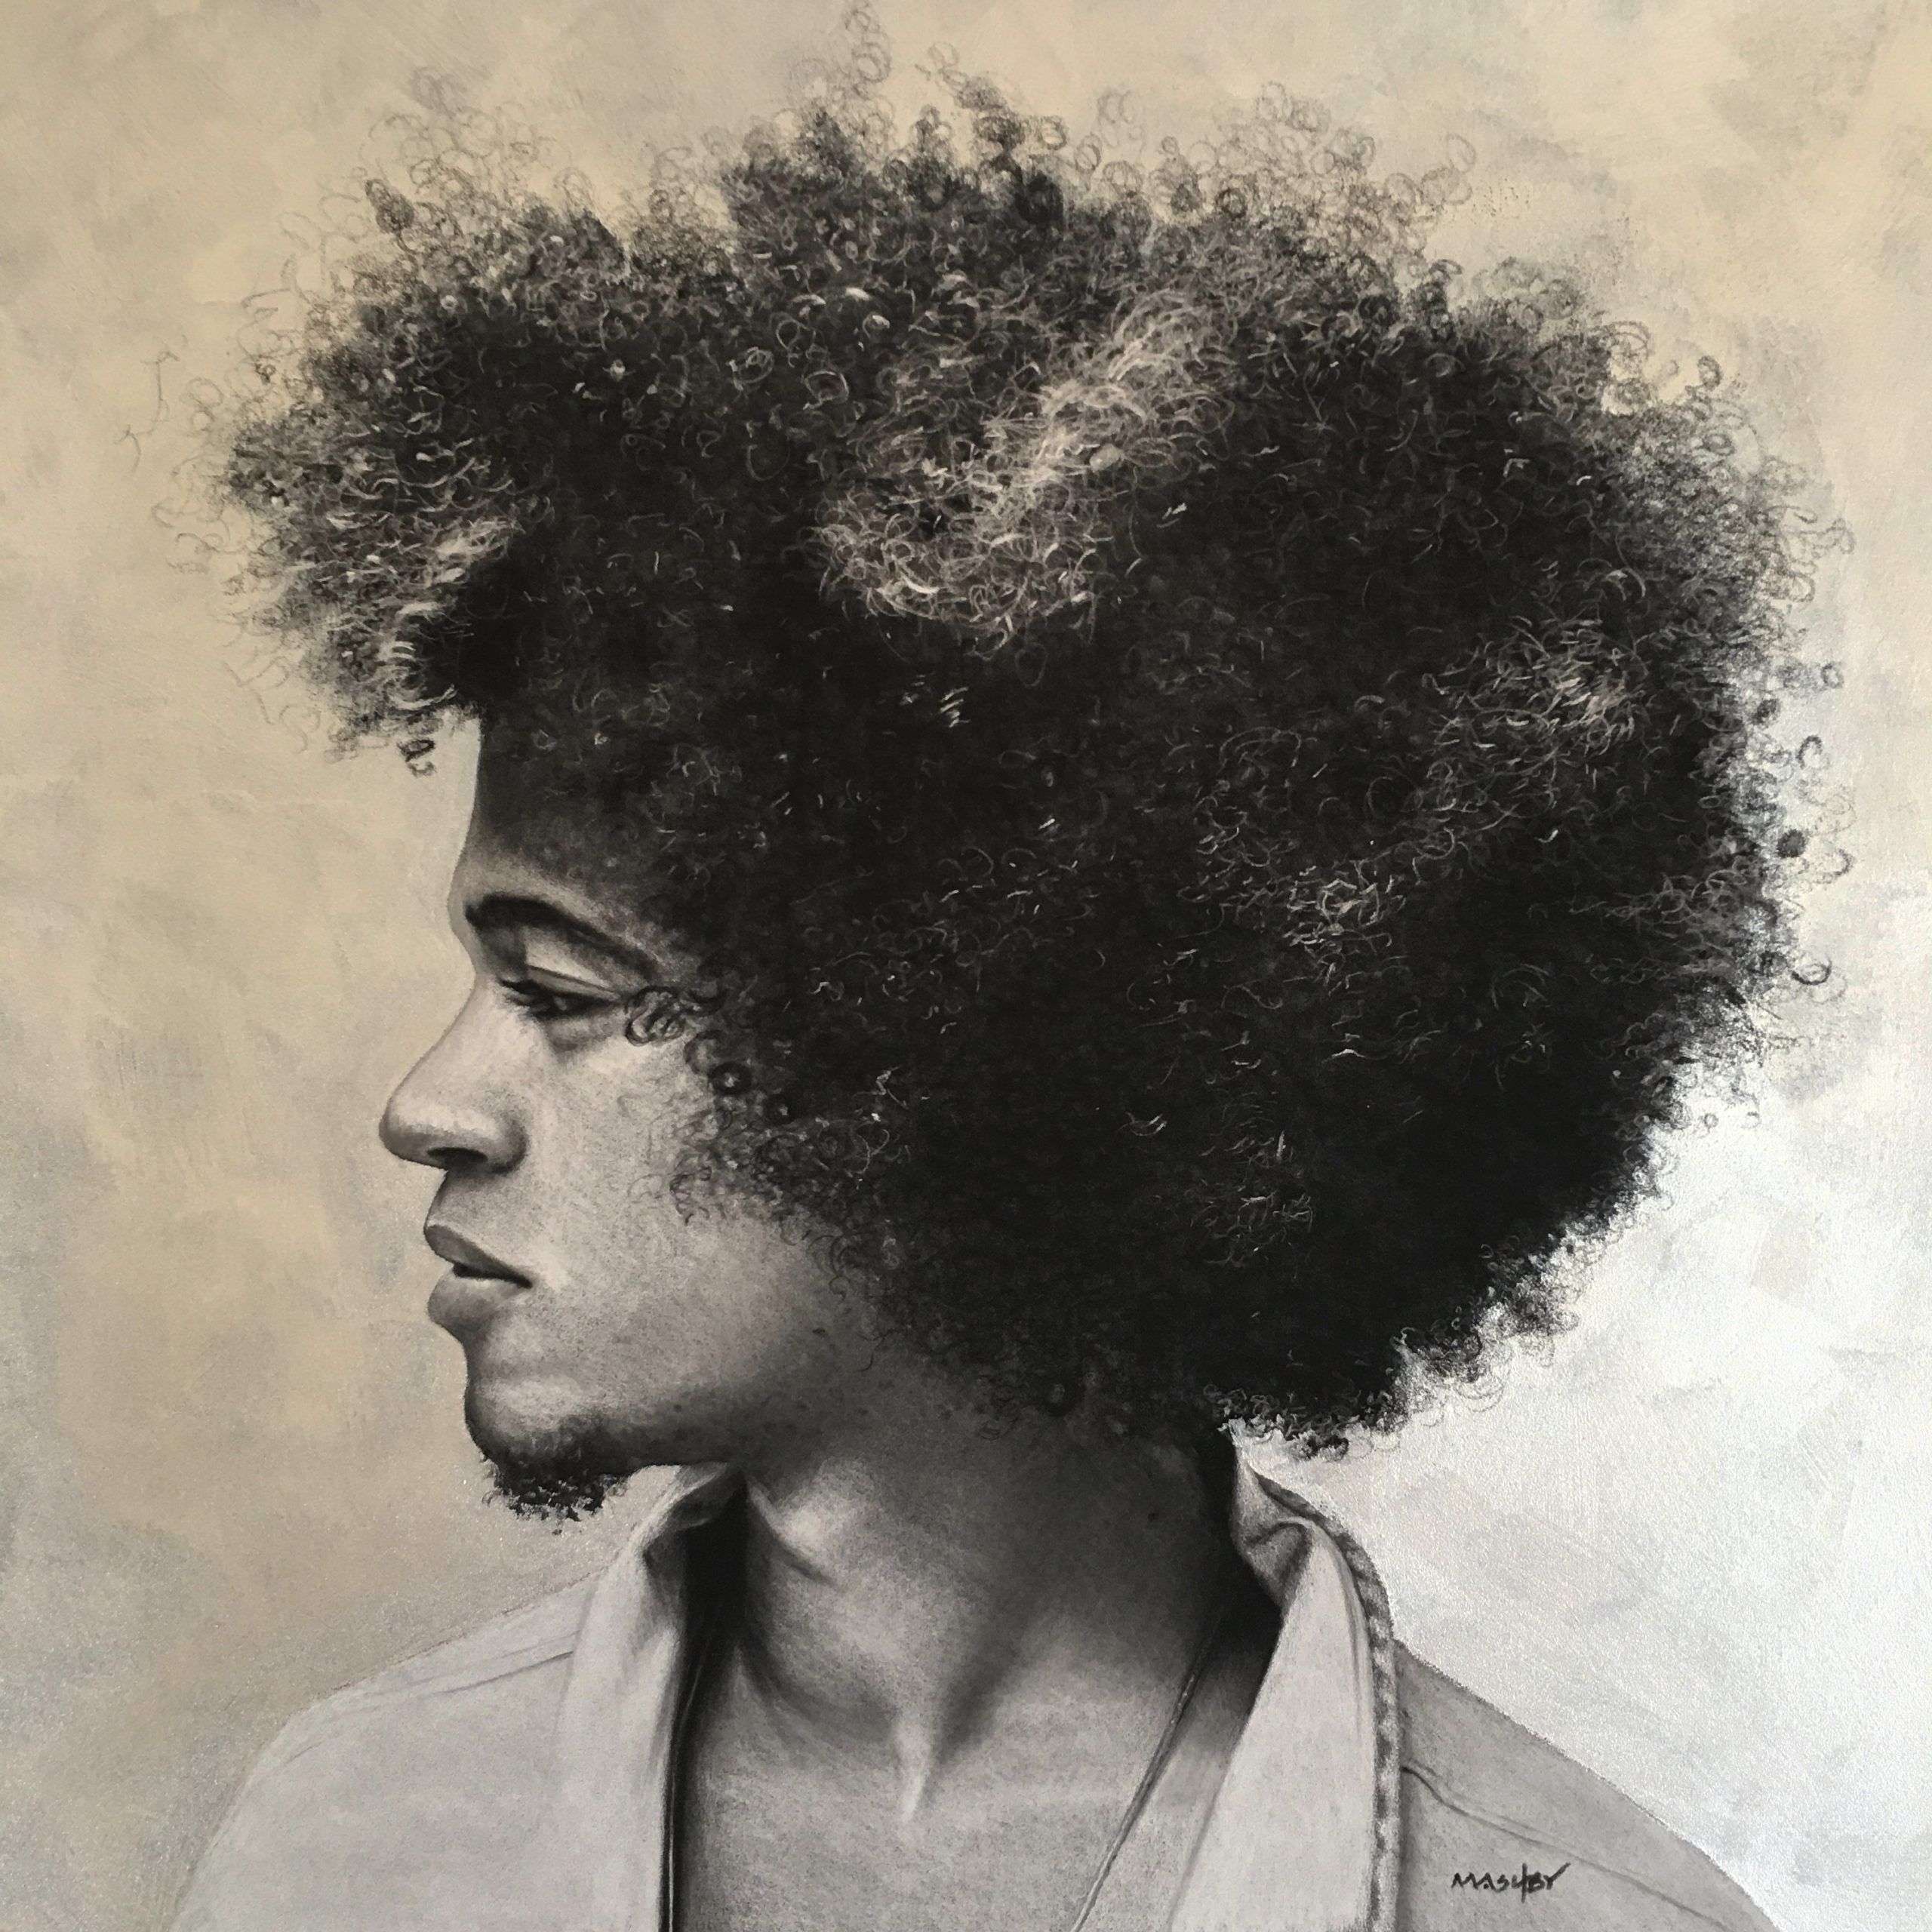
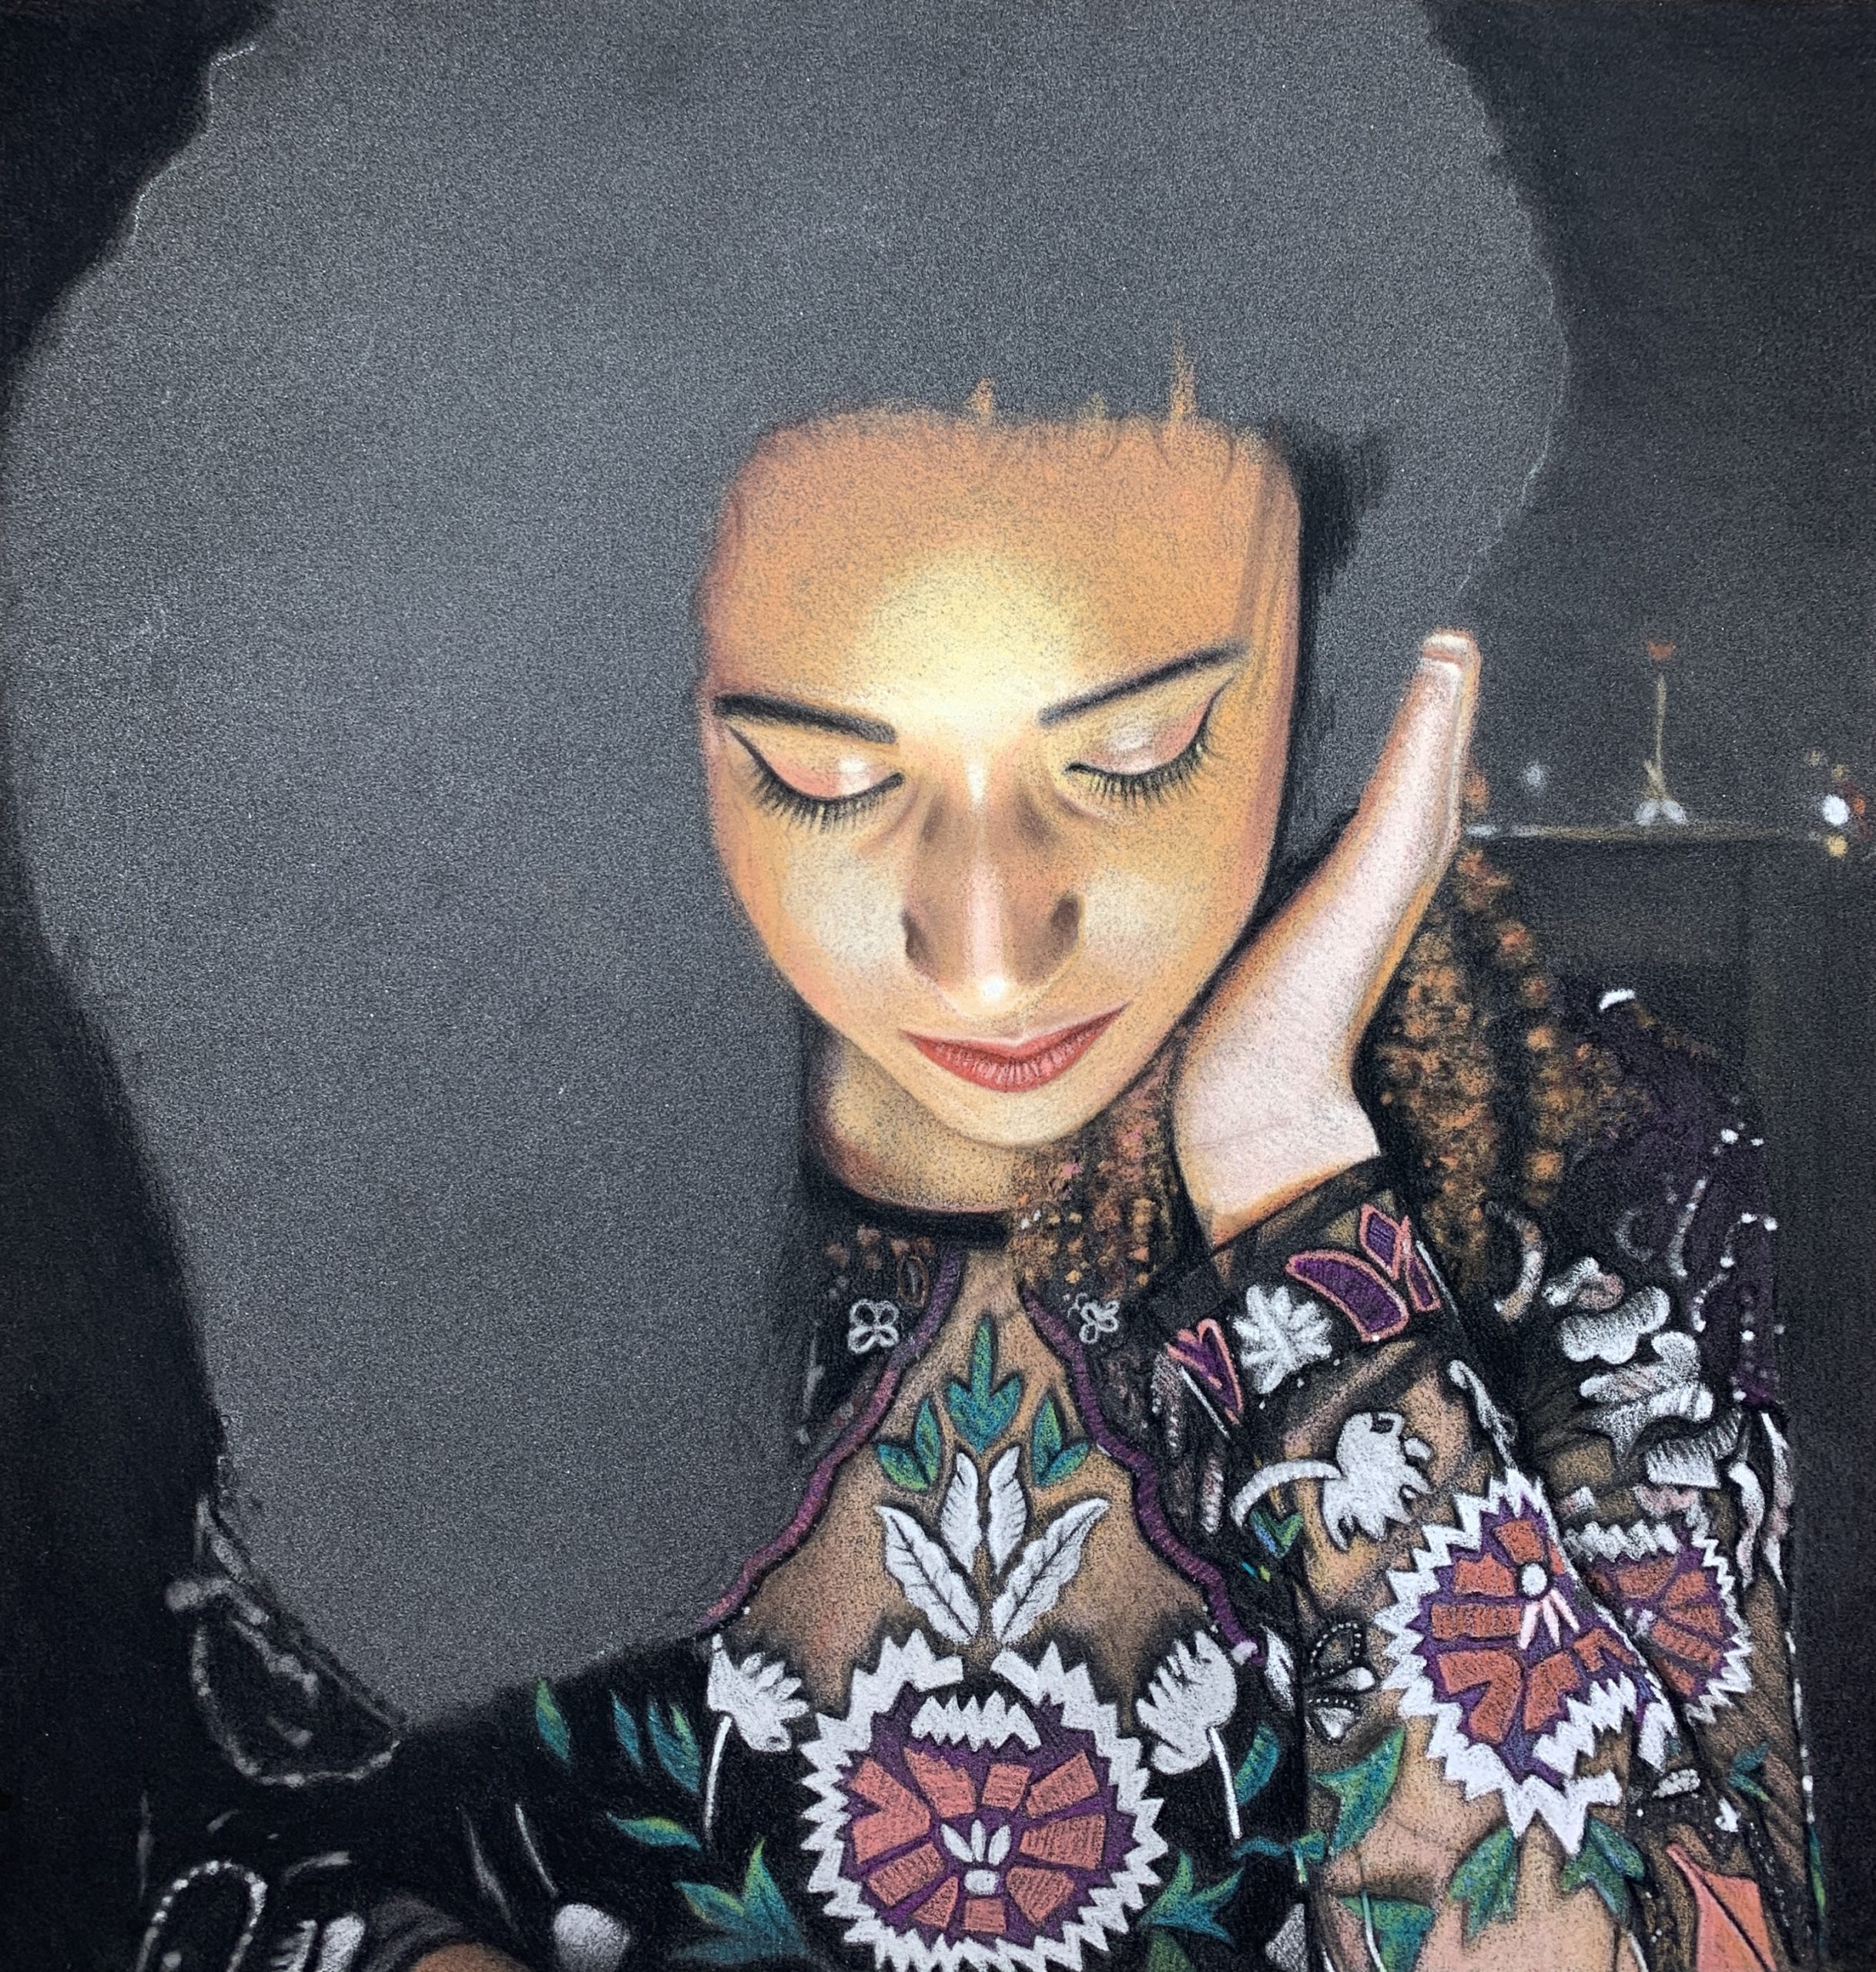
“The curly hair depicted above was actually created using just one colour. As this piece is a monochromatic portrait, I had the constraint of using just black, white, and greys. Creating the hair was a technique I fell upon as I was working through this portrait.
I must admit I left the drawing of the hair until last because I wasn’t actually sure how to go about doing it. Happily, sometimes good accidents happen.
I had completed the face and put the liquid metallic acrylic in, brushing it loosely and lightly, with hardly any paint on my brush, to give the effect of a rough edge to the hairline. Now it was time for the hair. There was nowhere else to go so I just had to get on with it.
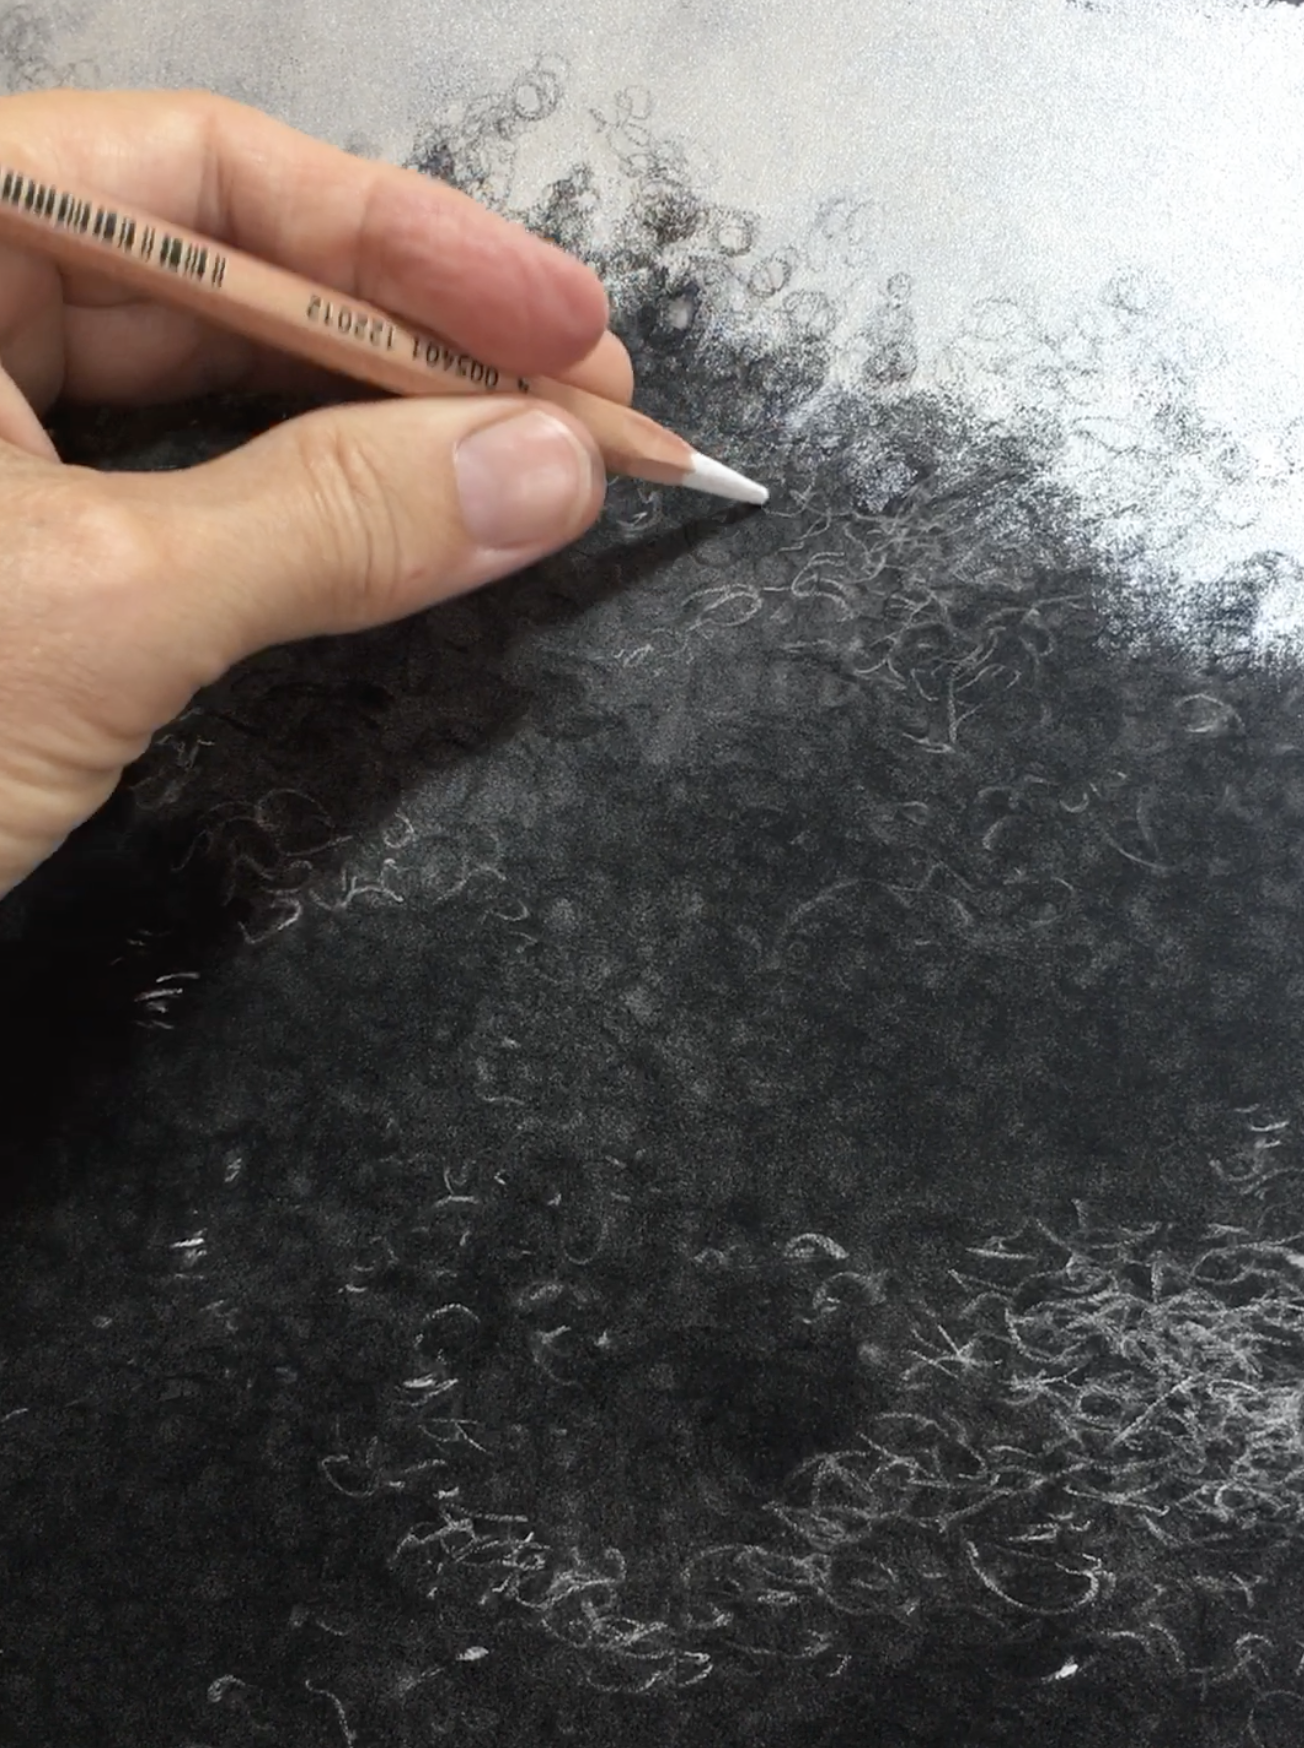
Starting with a Faber Castell 270 pastel pencil, I went about making random swirls and squiggles and to my absolute delight, these gave the effect of making the hair very realistic. It was exactly what I wanted. I alternated the pressure I used. Firmer pressure allowed for the pigment from the pencil to be stronger therefore lighter and brighter in certain parts while using less pressure allowed the curls to recede where necessary. Since this piece, I always paint the hair last as I feel that is the correct way to go about things.
By the way, the hair in Voodoo Chile took approximately 20 minutes.”

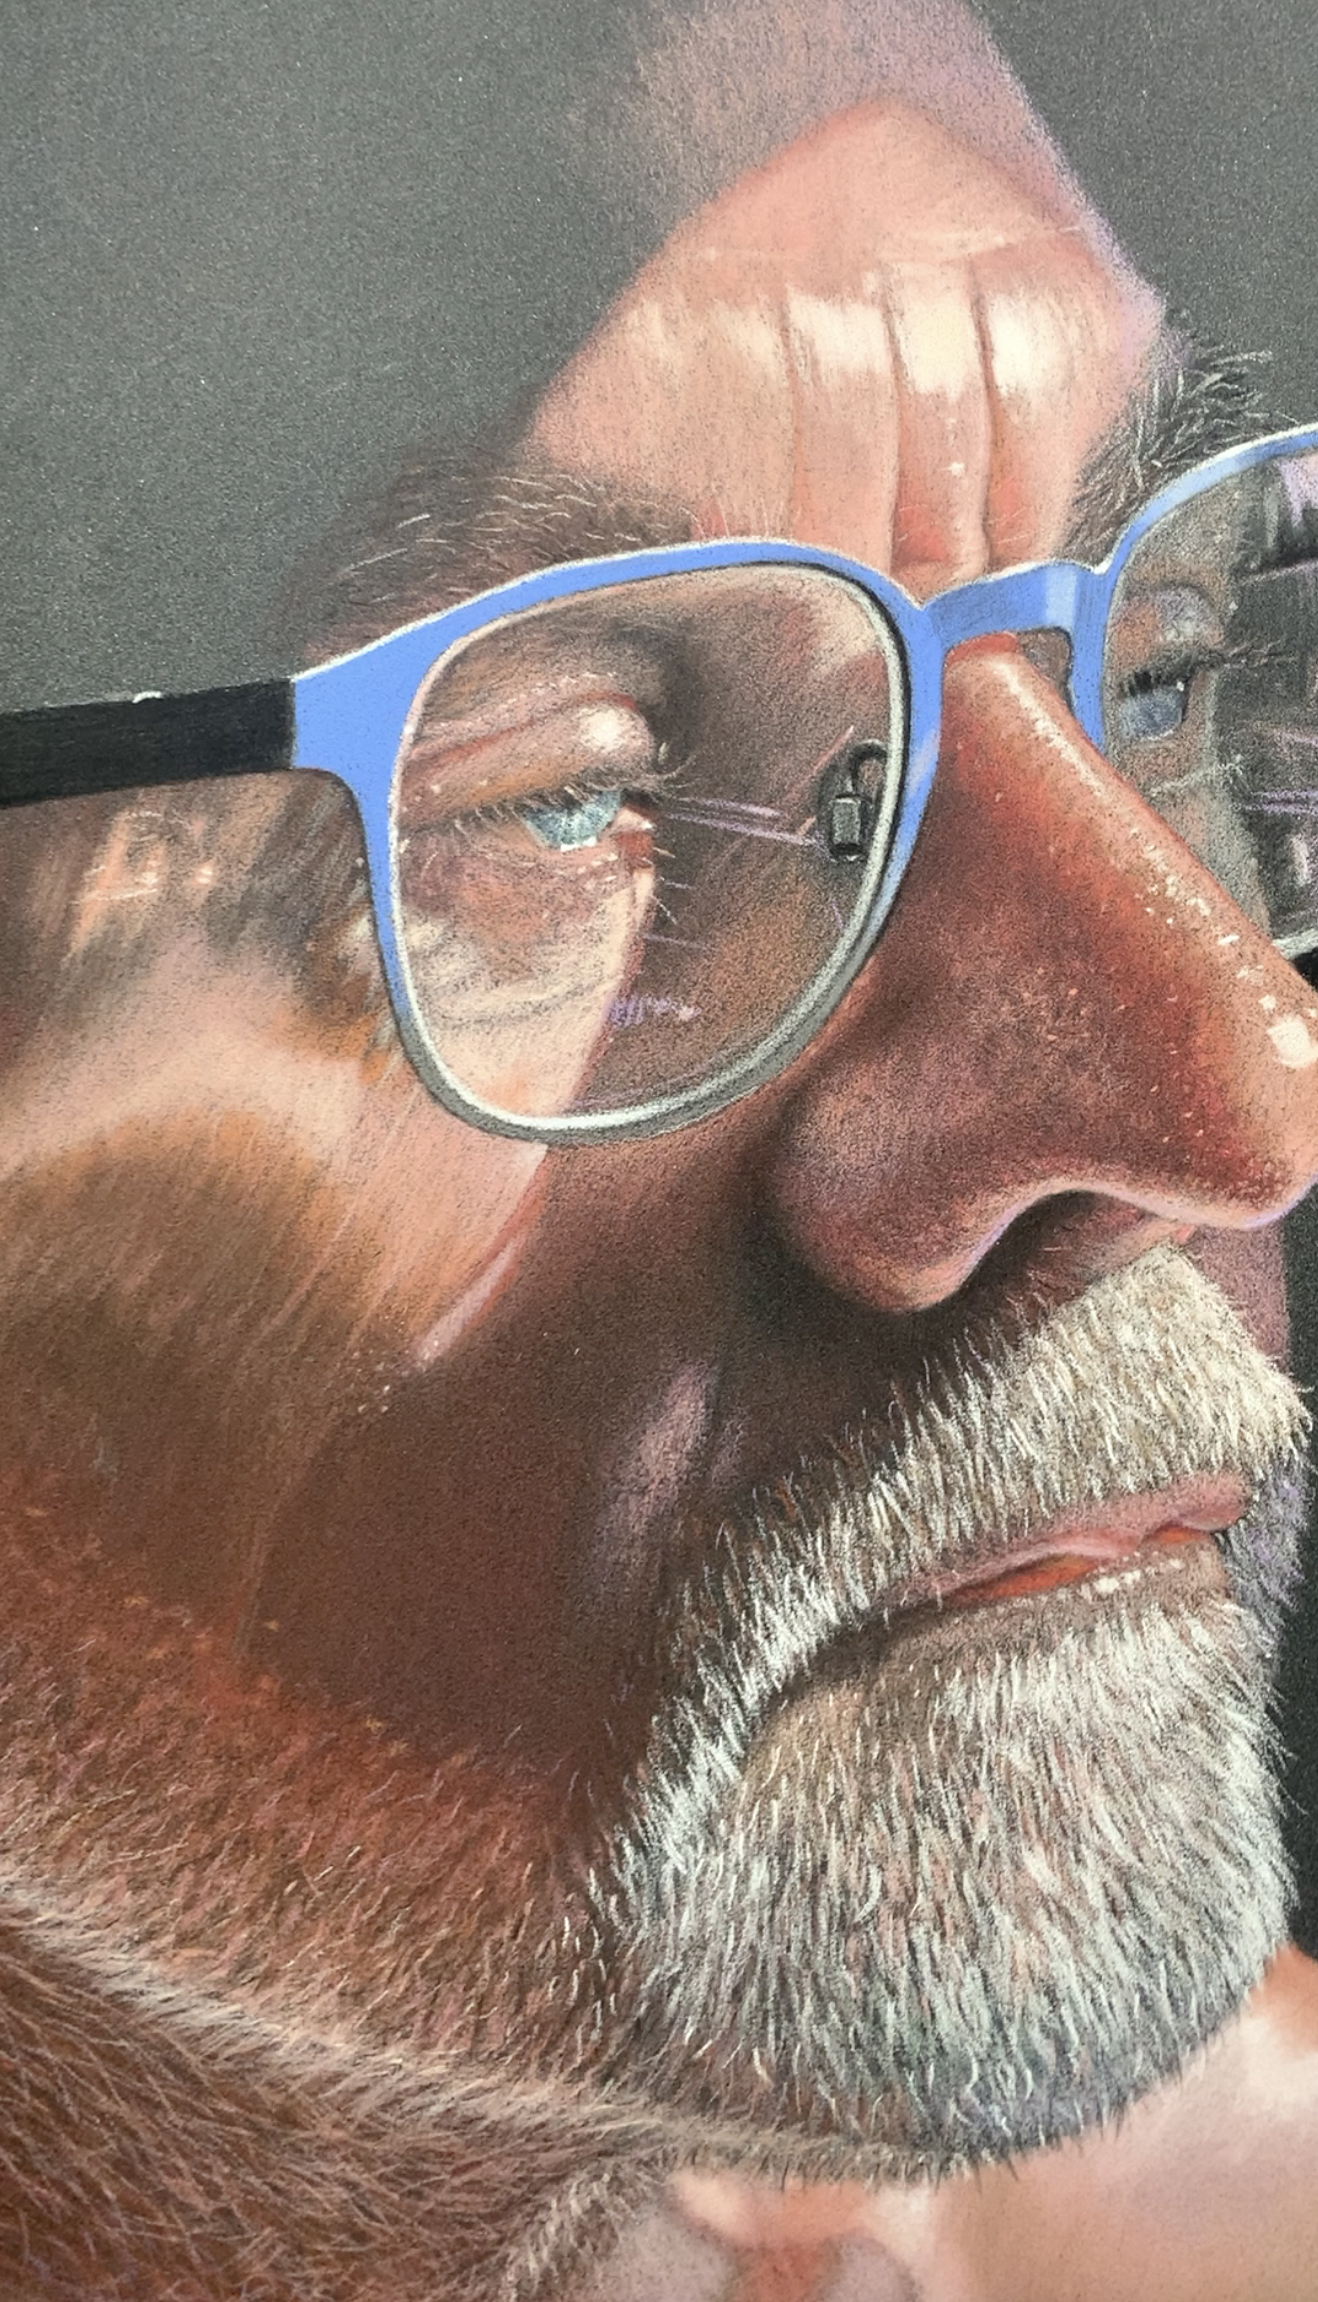
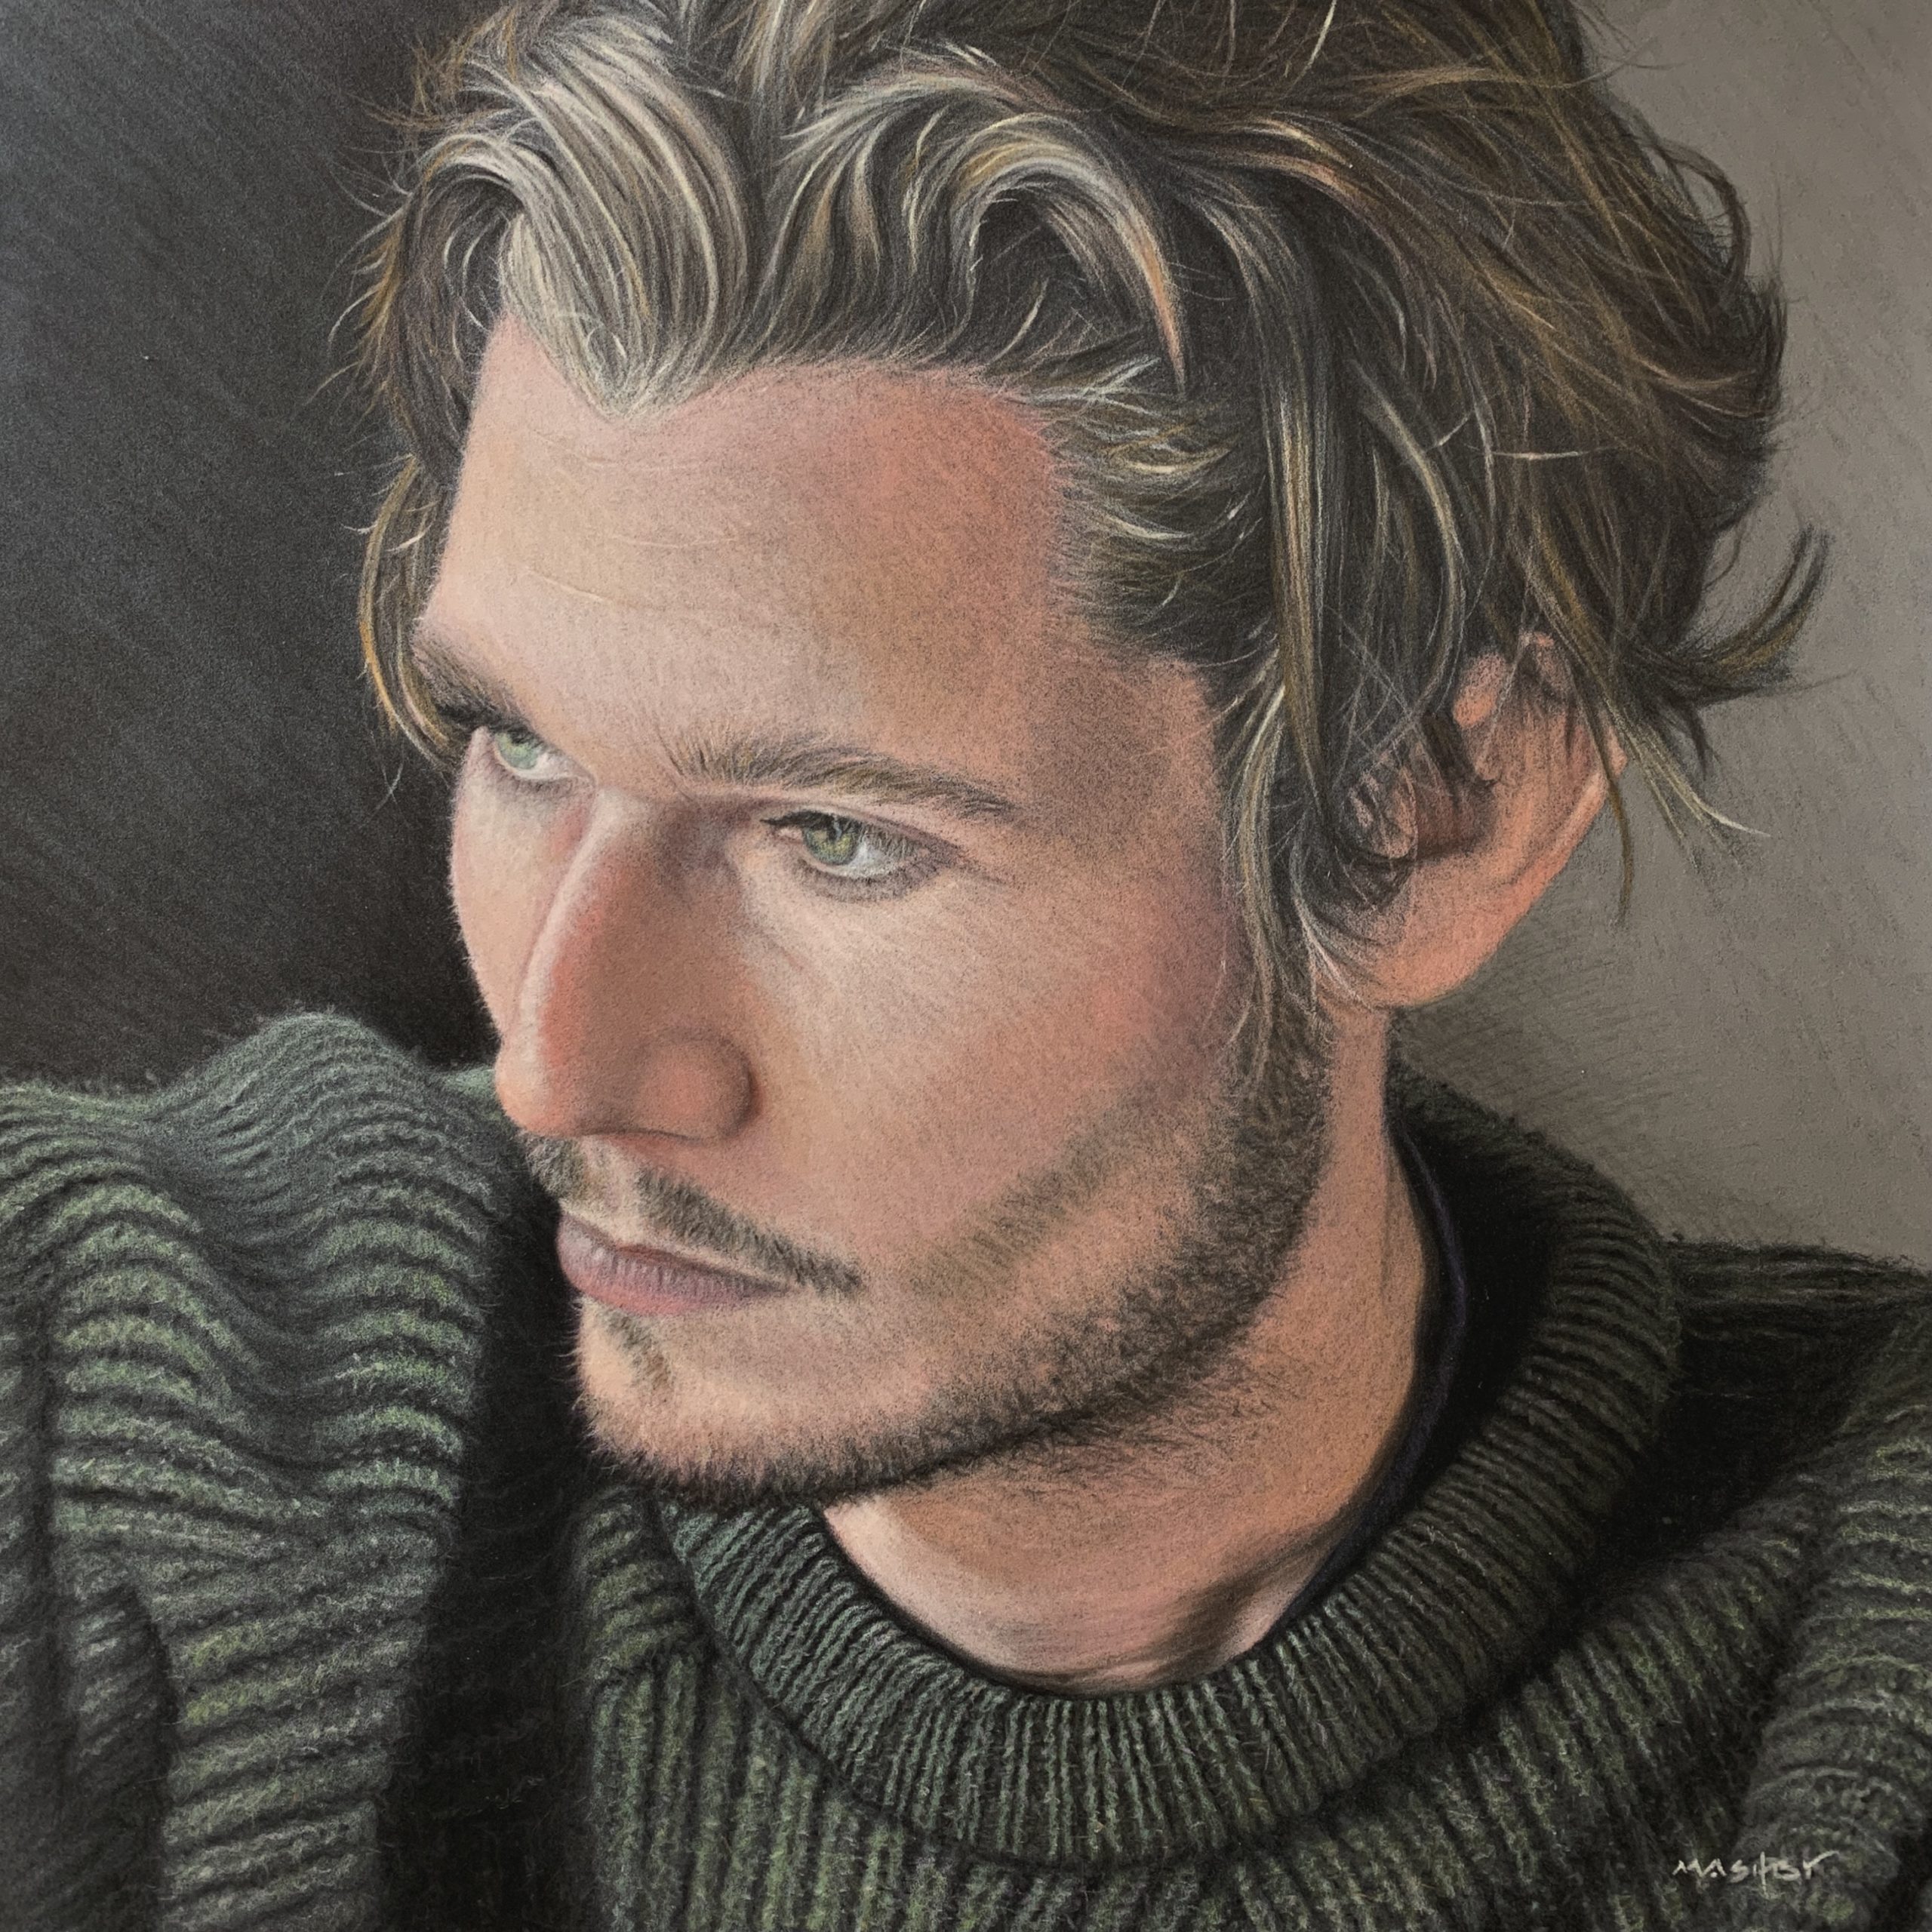
“When it comes to grey hair, I believe the most important thing to remember is to keep your brightest lights until last. In this portrait of my husband, his hair is wet which gives the hair strands that lovely separate look, making the sections even more defined. Again, working on the hair last, I used a dark pastel to block in the area marked out for his hair. I made sure to keep a much lighter touch around the hairline at the front as that’s where the majority of the lighter grey hair is.
Once this is done I use the flat of all of my fingers to blend away the pastel nearest the face to encourage the flesh tones and the first layer of hair colour to interact slightly. In this particular portrait, there’s a strong cast shadow across the forehead and into the hair, so the tones are very similar.
With the same colour pastel I used for the blocking in, I start laying in some broader strokes of hair. Then I choose slightly lighter pastels to either paint around these darker tones or on top as I build up those lighter greys. I introduced some soft pinks and lilacs into the hair to give more of a cohesive balance and warmth to the portrait, finishing up with the brightest touches of white that I use very sparingly.”
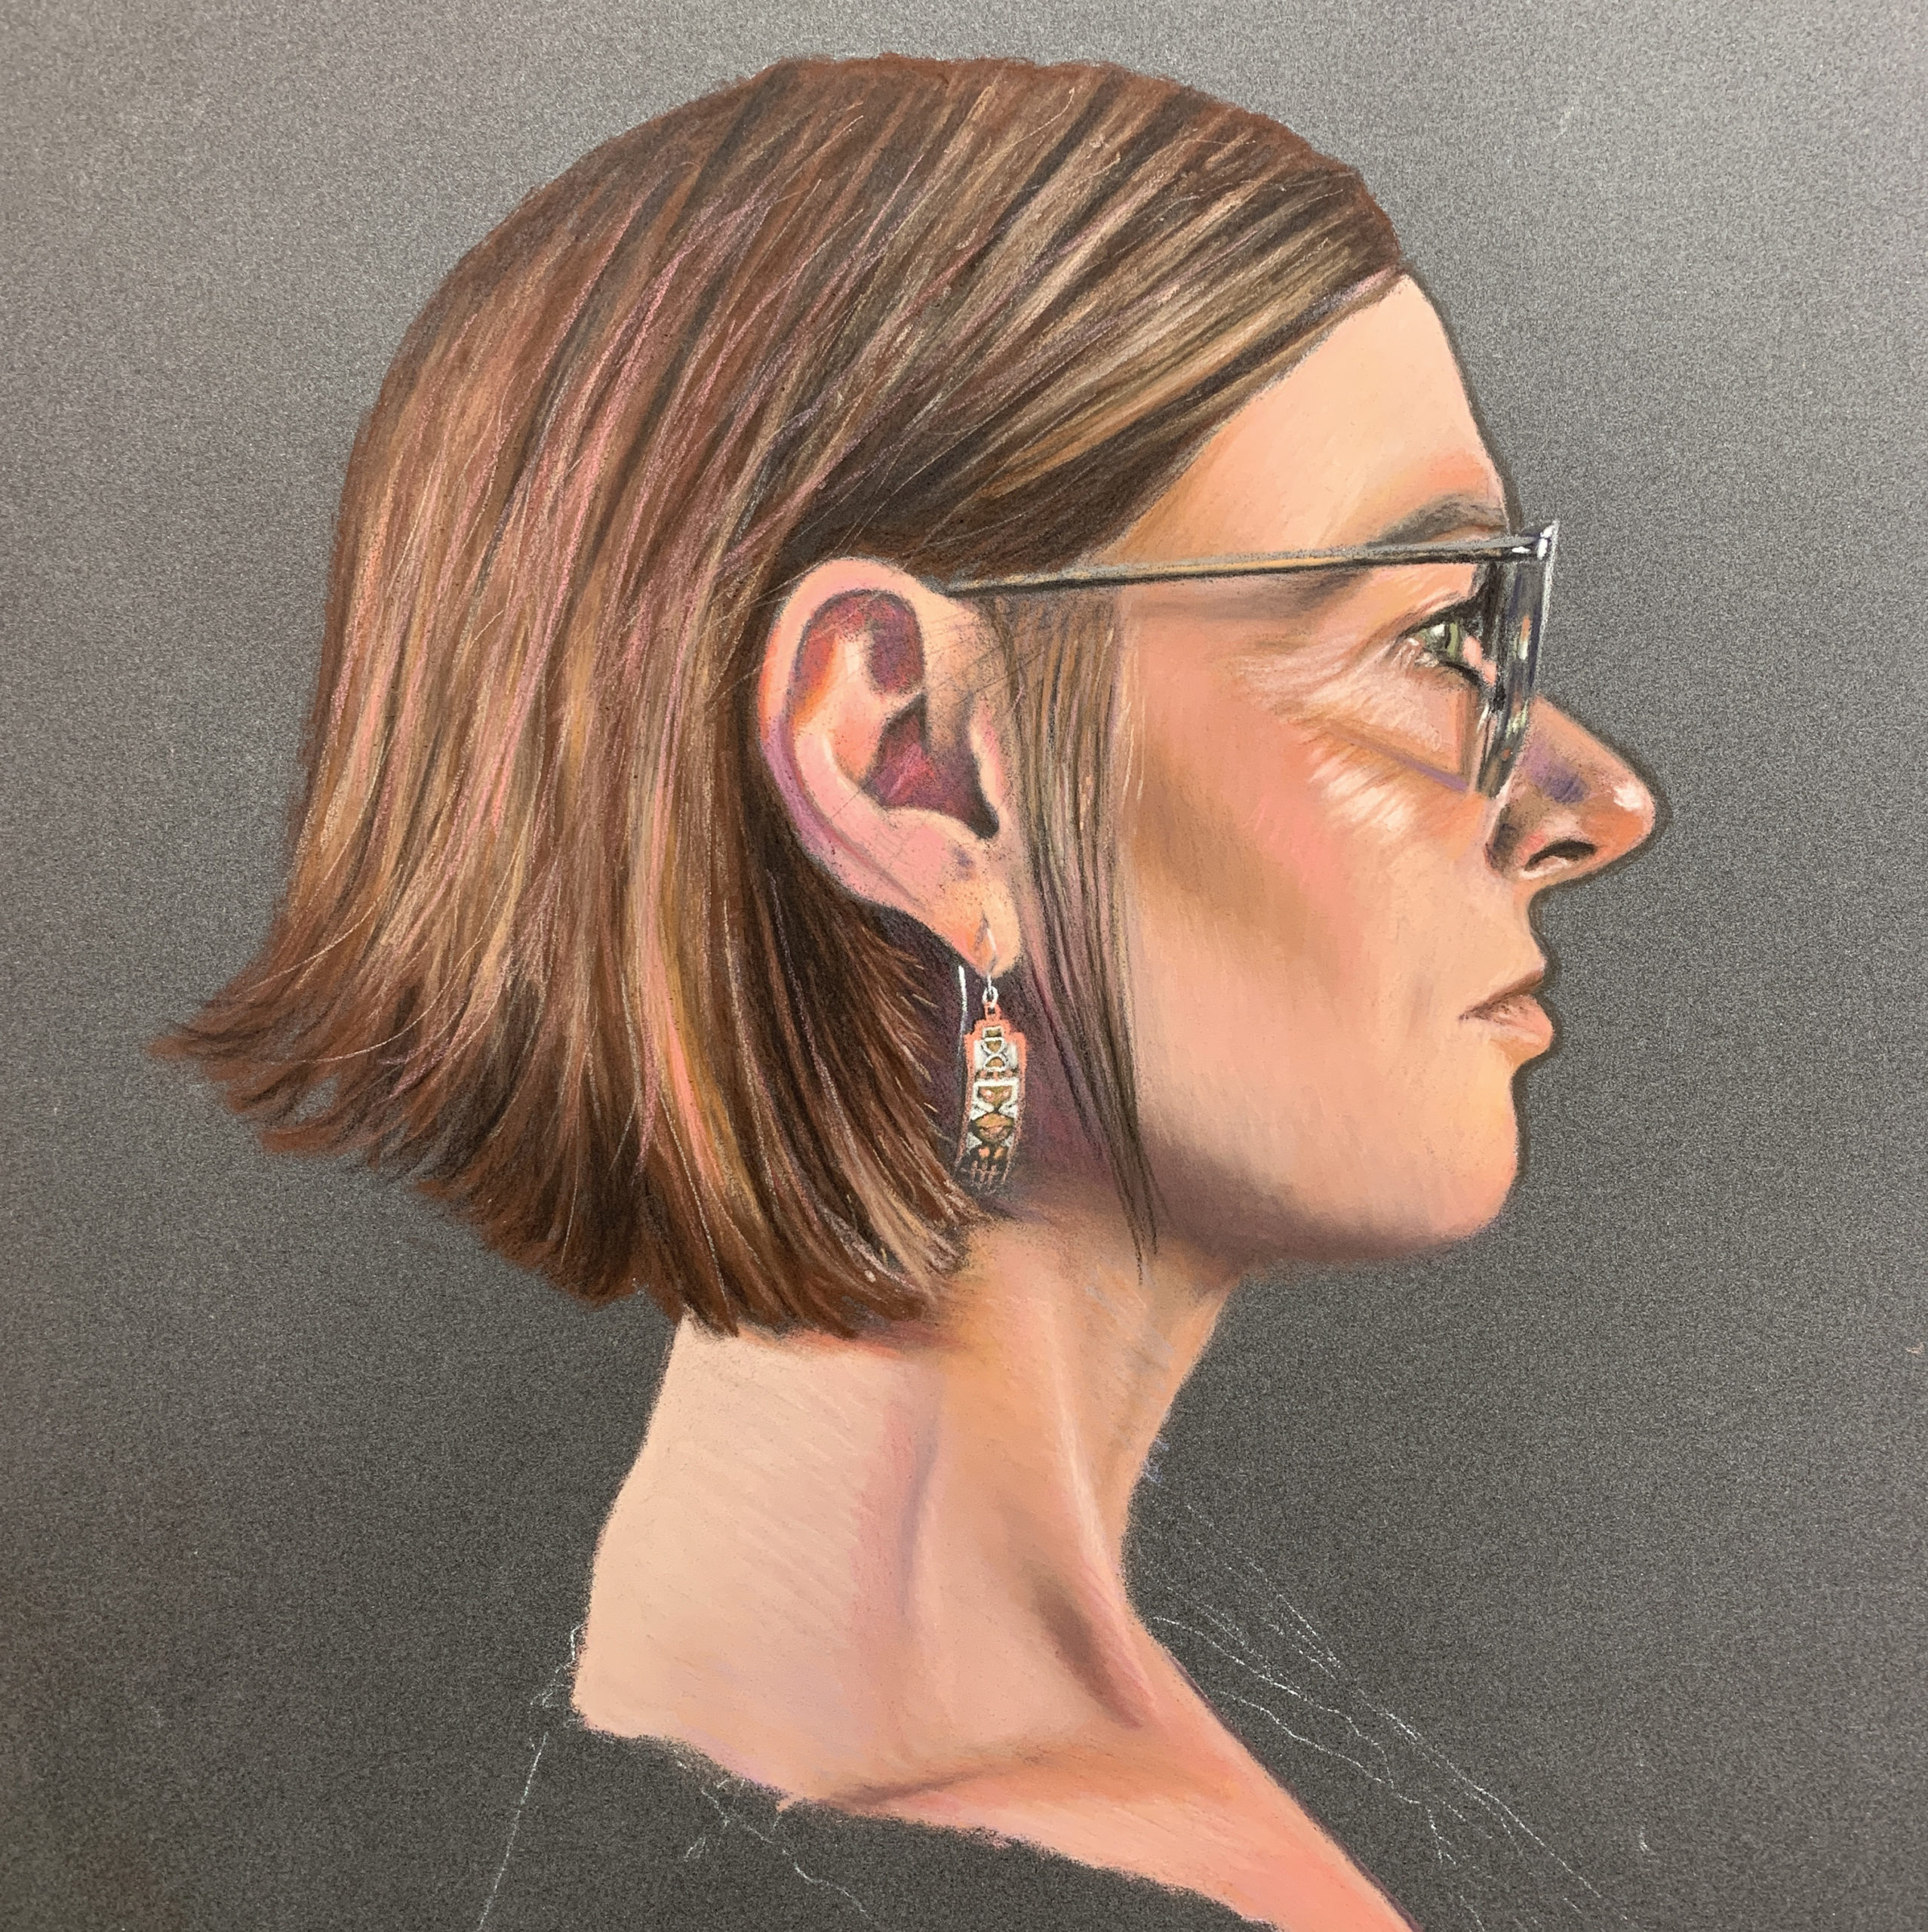
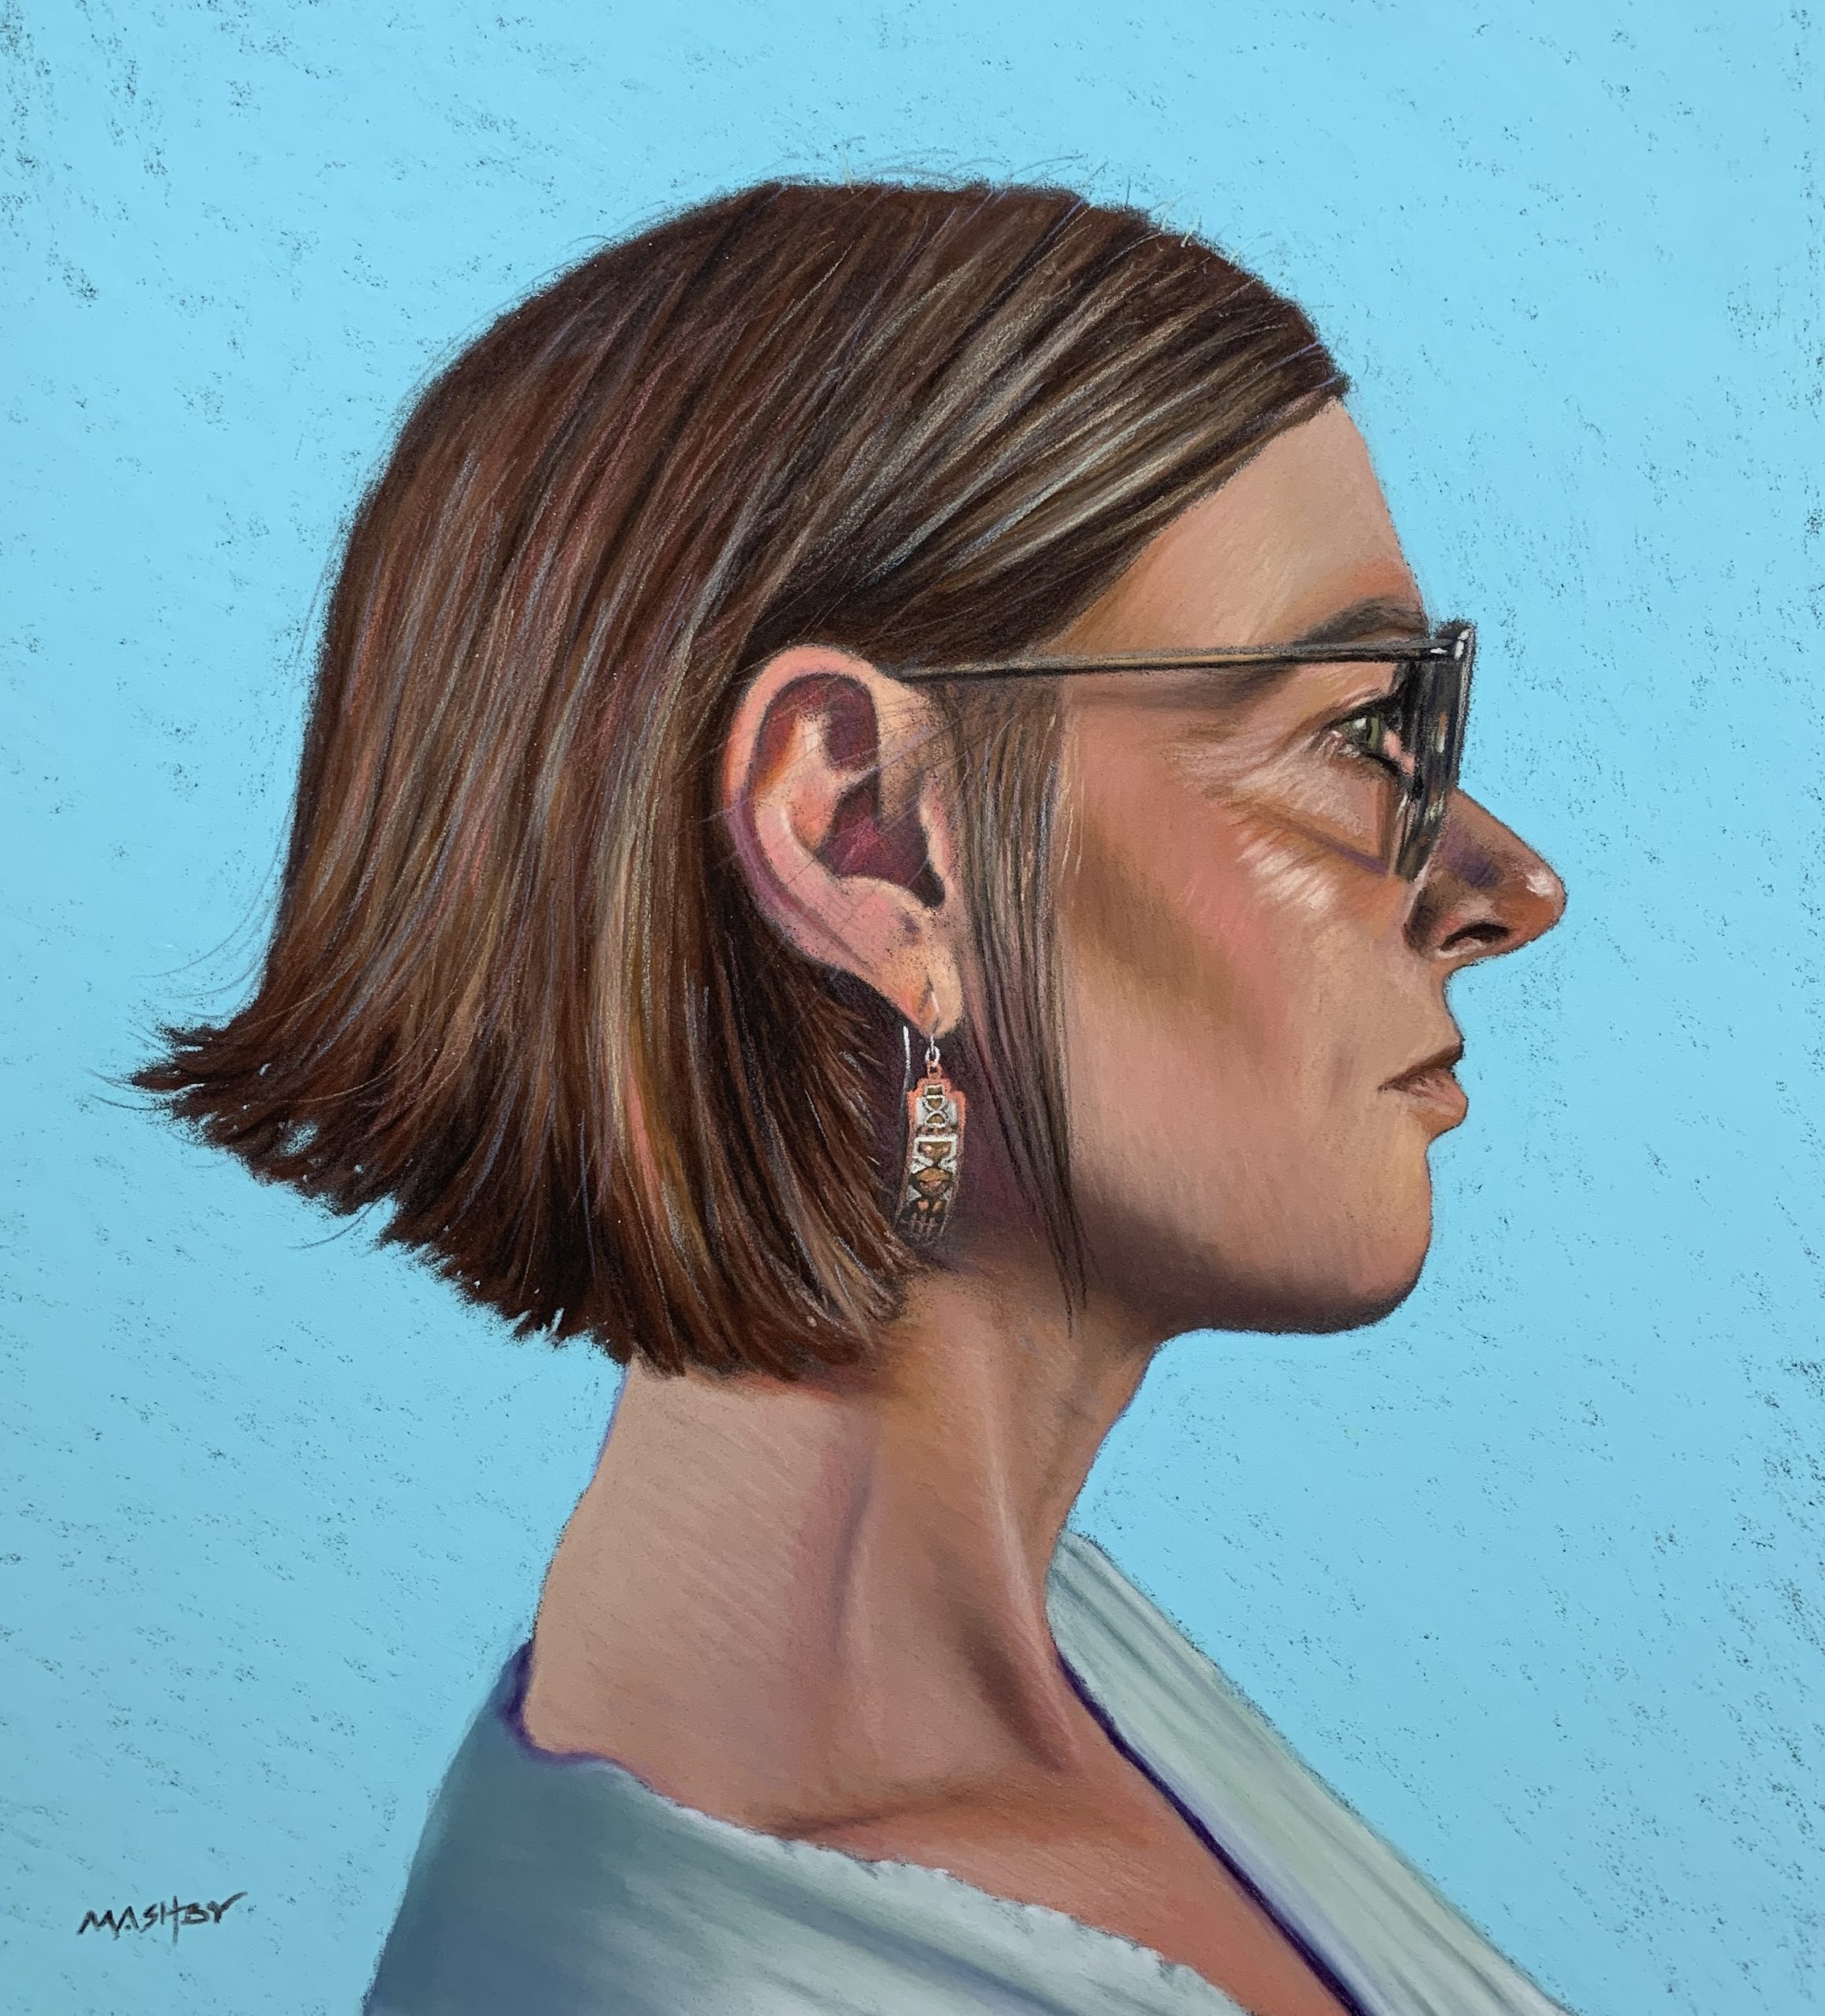
“For my latest portrait, it was the model’s hairstyle that actually made me want to paint her.
I specifically chose a profile pose as my model has a beautiful long neck and classic bob haircut setting off her striking features. I chose a bright blue background to allow her top to recede, making the portrait all about my muse and the graceful shapes her outline created.
With my model having straight, dark hair, I wanted to allow myself some artistic licence by way of some additional colours. Why not? It’s your work. What’s the worst that can happen?!
Once I had blocked in with a couple of deep red/browns soft pastels, again ensuring I use a light touch as I don’t want to fill up the tooth of the pastel surface, I used various shades of dark and light brown to add definition and depth to the hair.
Looking carefully at my reference but also using my knowledge and understanding of shape and form, I checked to ensure the hair is sitting on the head rather than simply looking cut out. I left the brightest colours, including a blue to match the background, until last. Importantly, I used this blue and another slightly lighter shade of blue to add those important flyaway wisps of hair that make for a ‘believable’ portrait.”
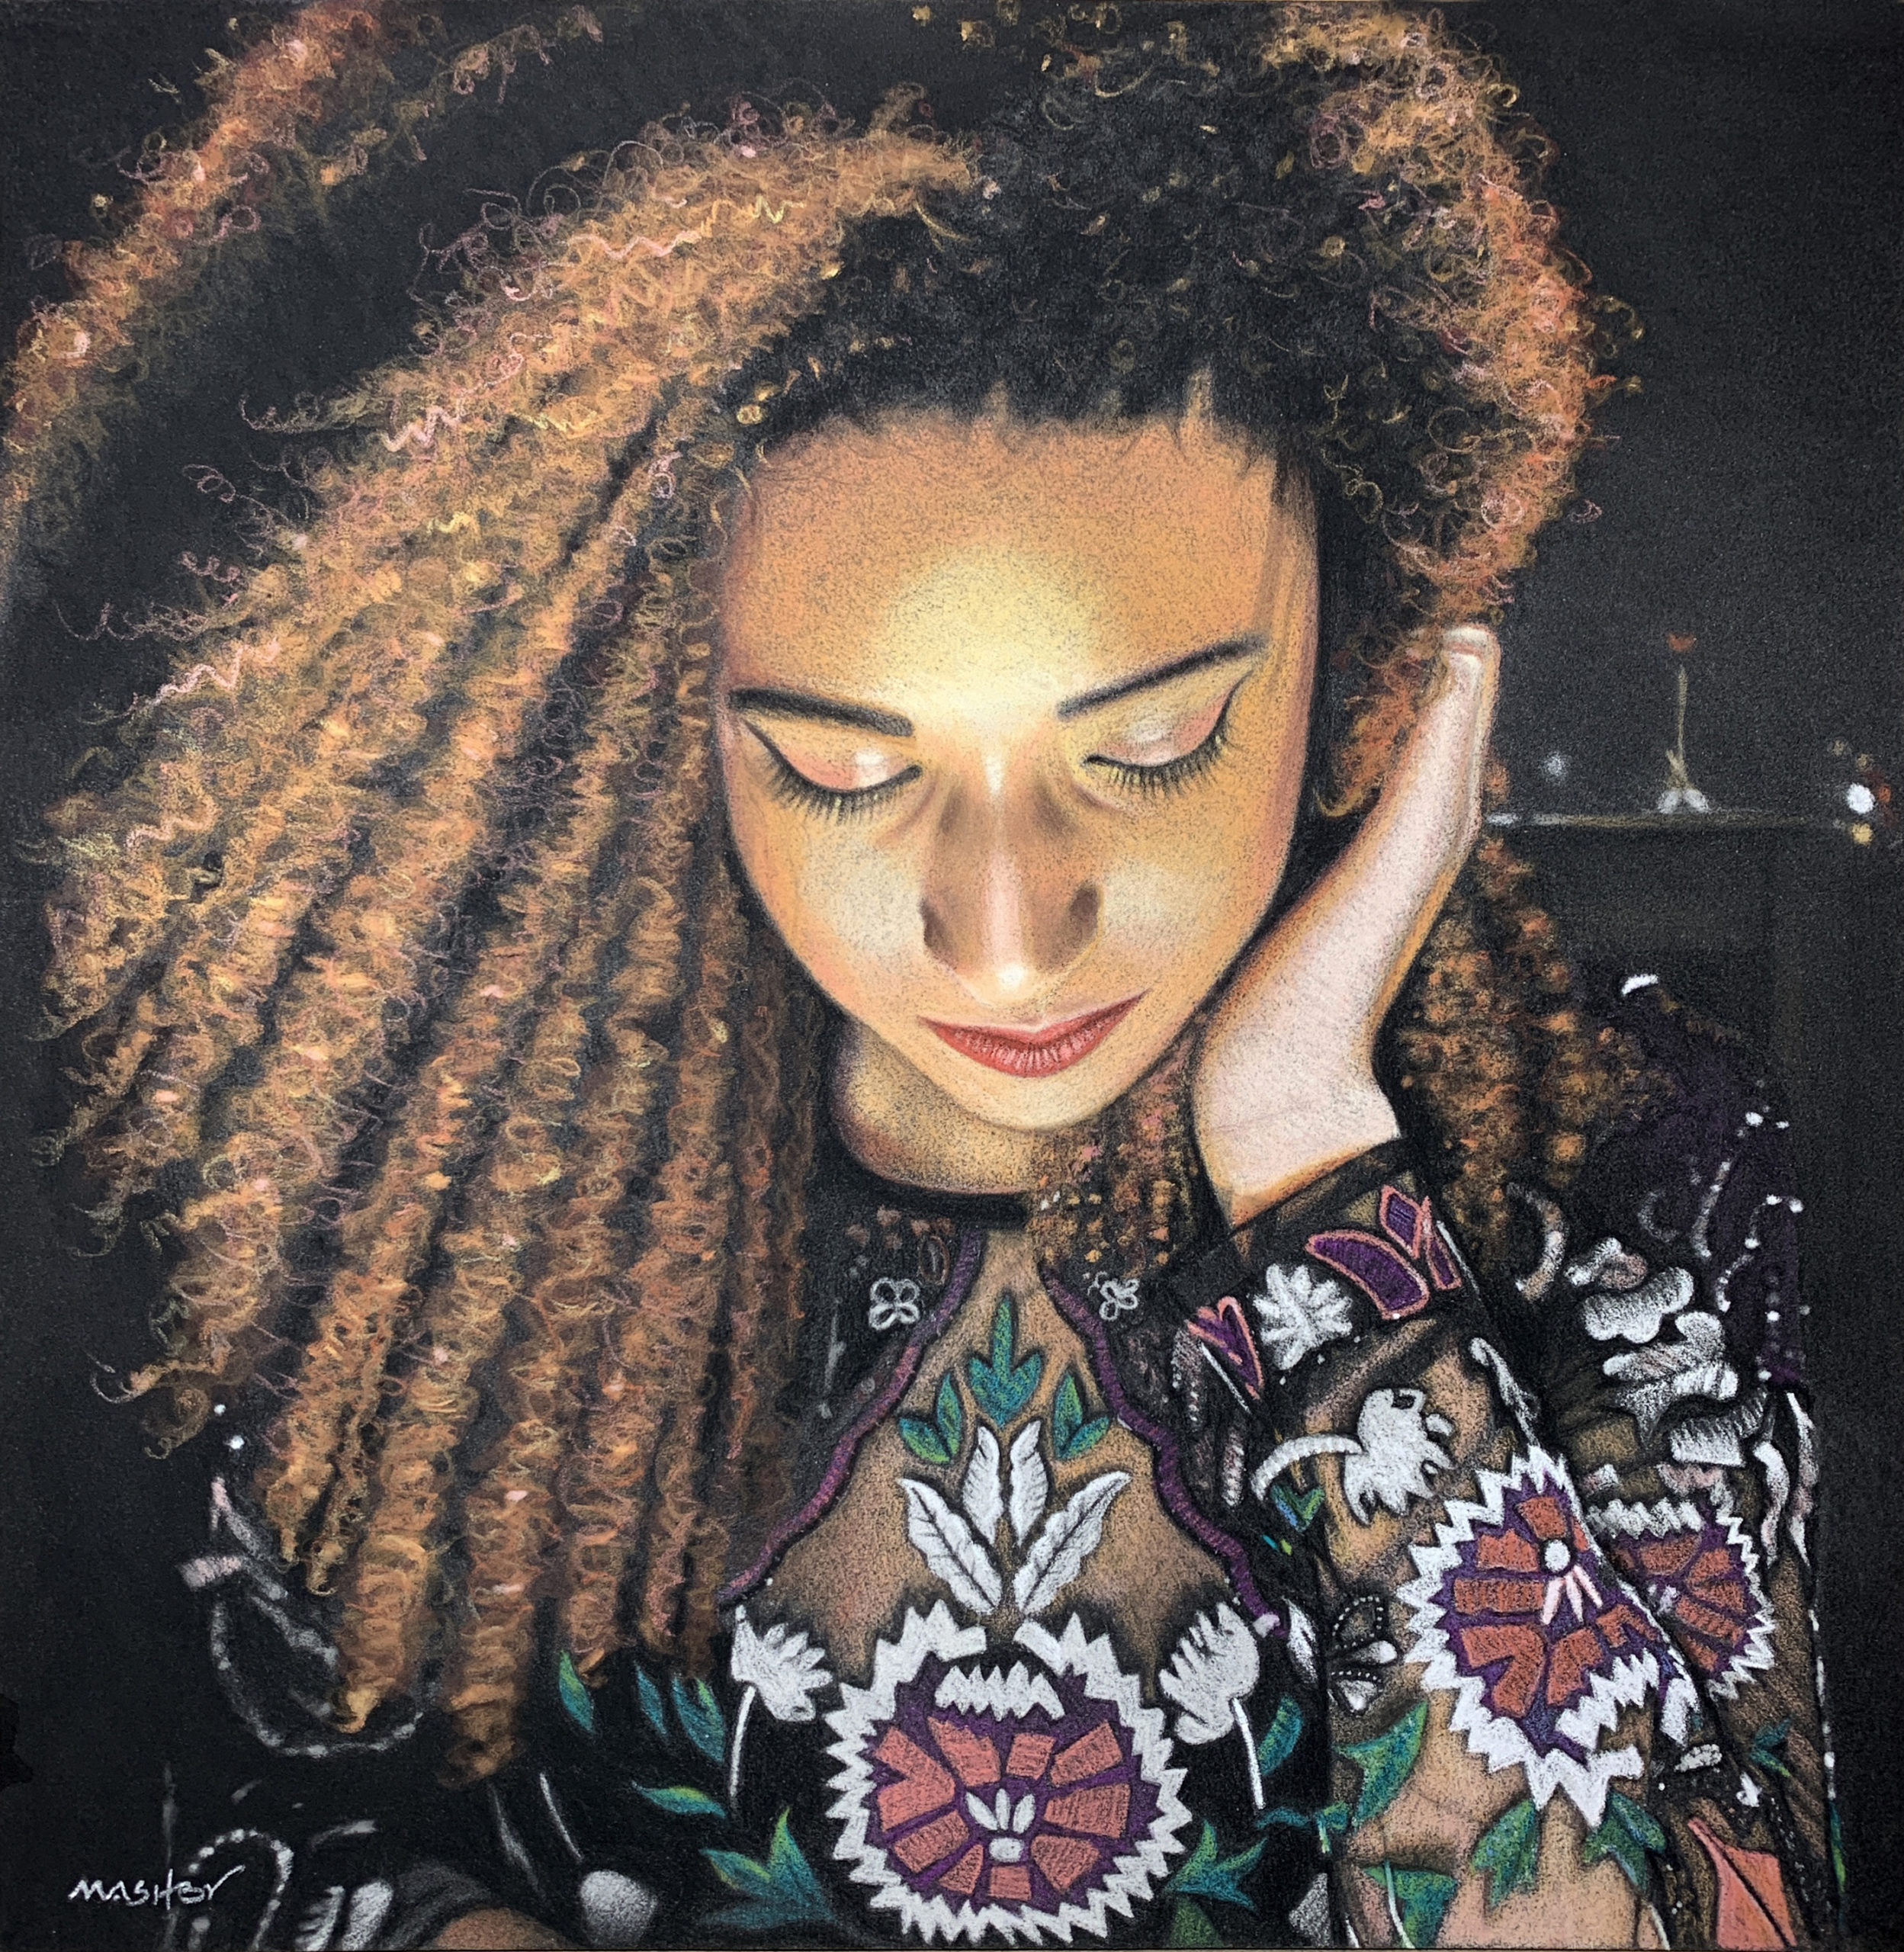
“This painting was an absolute joy to paint. Sometimes everything falls into place. It doesn’t always happen that’s for sure but with this piece, it felt like it almost painted itself.
With the rich embellishment of the garment along with the warm low-positioned lighting, I wanted the hair to frame and emphasise the intimacy of this small painting, allowing the viewer a secret peek into the sitter’s world. I wanted it to give a feeling of a special moment captured in time.
The way her hair flows around the painting is key to the tightly cropped composition. She gently pushes away her hair from her face on one side, allowing the other side of her hair to cascade in perfect ringlets over her shoulder and around her petite heart-shaped face. This takes the viewer on a journey around the hair and up through the hand and back to the focal point at the centre of her face.
I used only colours that would emphasise the warm lighting. At first, I loosely infer the shape of the curls by way of curved, arched mark-making and wiggly lines using the flat of my pastel pencils to give a broader mark. Then I go in with lighter, smaller marks and with lighter tones for the highlights and areas where the light catches the errant strands.
Notice how I’ve allowed the dark areas at the crown of her head to sit back quietly without much attention or mark-making with just a couple of gentle touches of colour allowing the viewer to fill in the blanks. The area of hair to the left of my muse’s head is tipped in quite roughly but it’s enough to indicate the necessary structure.
Again, with this technique, it took me only about 15 minutes to produce the full body of hair.”
_____________________________________________________________________
How to paint hair in a nutshell
- Turn your substrate around if you’re struggling – sometimes a different viewpoint can make you see better and understand more
- Don’t try and paint every strand of hair
- Sometimes less is more
- Try holding your pastel loosely twisting and turning it between your first two fingers
- Adjust your pressure
- Adjust your hand and forearm positions for different mark-making
- When you think you’ve finished with hair – you won’t be. There’s always those lovely fine wisps going in different angles that will make a portrait sing!
- Look for those areas where you can add extra boldness of colour
- Think about bringing in your background colour too
Ohhhh thank you Michele. Such fabulous tips on how to paint hair!!
Michele and I would love to know how this was helpful to you so be sure to click on where it says “Read & share this story online” to leave a comment.
And that’s it for this time!
Gail

“I must admit I left the drawing of the hair until last because I wasn’t actually sure how to go about doing it.” – honesty! I’ve struggled with creating hair and am glad to see a whole newsletter devoted to it. I think this is one I’ll come back to periodically. I loved Michele’s demo at Pastel Live!
So great that this helps Susan! I love Michele’s honesty too 😁
Fabulous insight. Thanks for sharing your tips. I love these Friday emails.
Soooo good to hear Caitlin!! Thanks 😁