To answer the following question, Advisory Board member Michele Ashby shows us the grid method. And the question?
Do you have a creative prompt or easy-to-follow exercise that you use in your workshops or classes that you wouldn’t mind sharing?
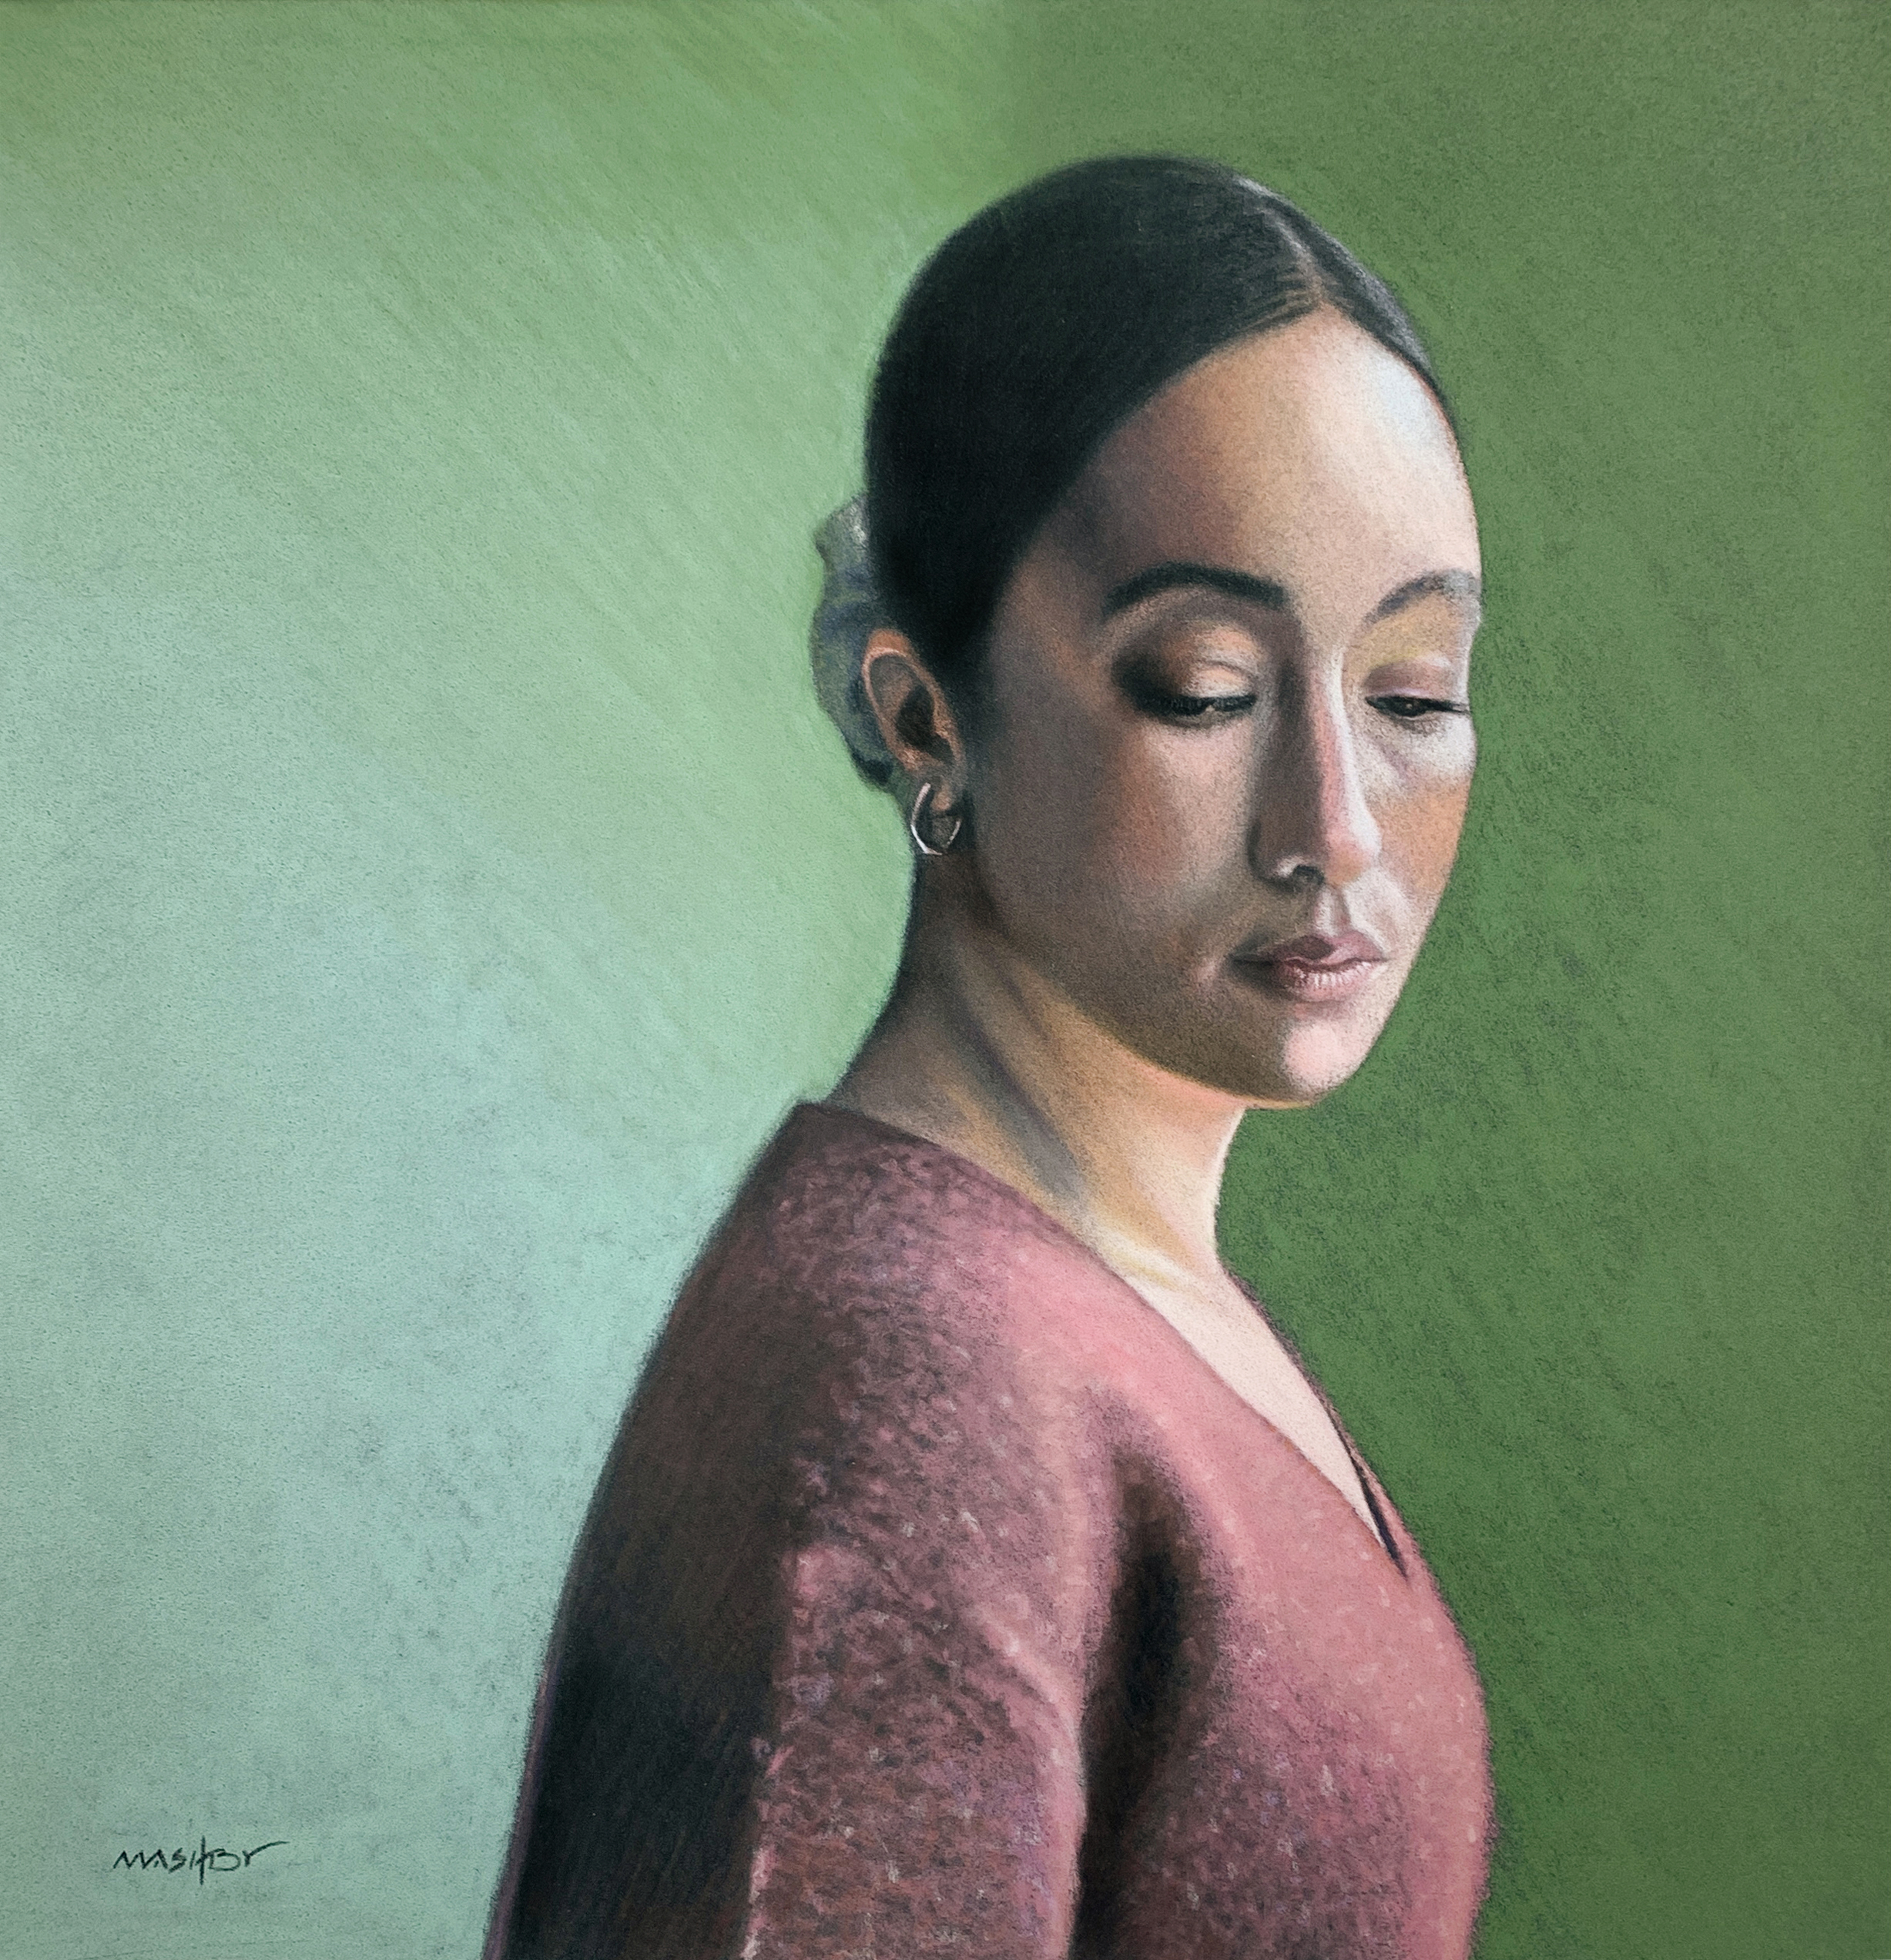
Michele is going to take us through her process. Here, first, is the finished painting:
Now let’s get into it! Here’s Michele to share the grid method.
“I’ve just introduced some budding artists in my village to the beauty of pastels at a weekly art workshop that’s been running for just a few weeks. When asked if I’d like to demonstrate how I use pastels over a three-week session, I jumped at the opportunity.
Being mindful of having some very inexperienced artists in the group, some of whom haven’t picked up a pencil – metaphorically speaking of course – since school days, I thought I would share the easy grid method of laying in a drawing using a reference image. This I hoped would give them some much-needed confidence at this fundamental basic stage.
The thought of starting a drawing with essentially a blank piece of paper staring back at you can often be an overwhelming experience for any artist but particularly for the beginner. By using the grid method, however, and carefully taking time to measure and map points of equal distance around the edges of the paper, joining them with considered straight lines, they put pastel to paper before even starting the drawing. This eliminates the where-do-I-start conundrum.
So how does it work?
You must ensure you have a 1:1 ratio meaning your image and your paper need to have the exact same number of lines.
First of all, decide whether you are going to be viewing your reference photo on your phone/iPad/computer or as a printed image. If you’re using an electronic device then the easiest way to create the grid is to download the app ‘Grid.’ It’s very simple to use and has a number of options for grid size, line width, and colourway to choose from.
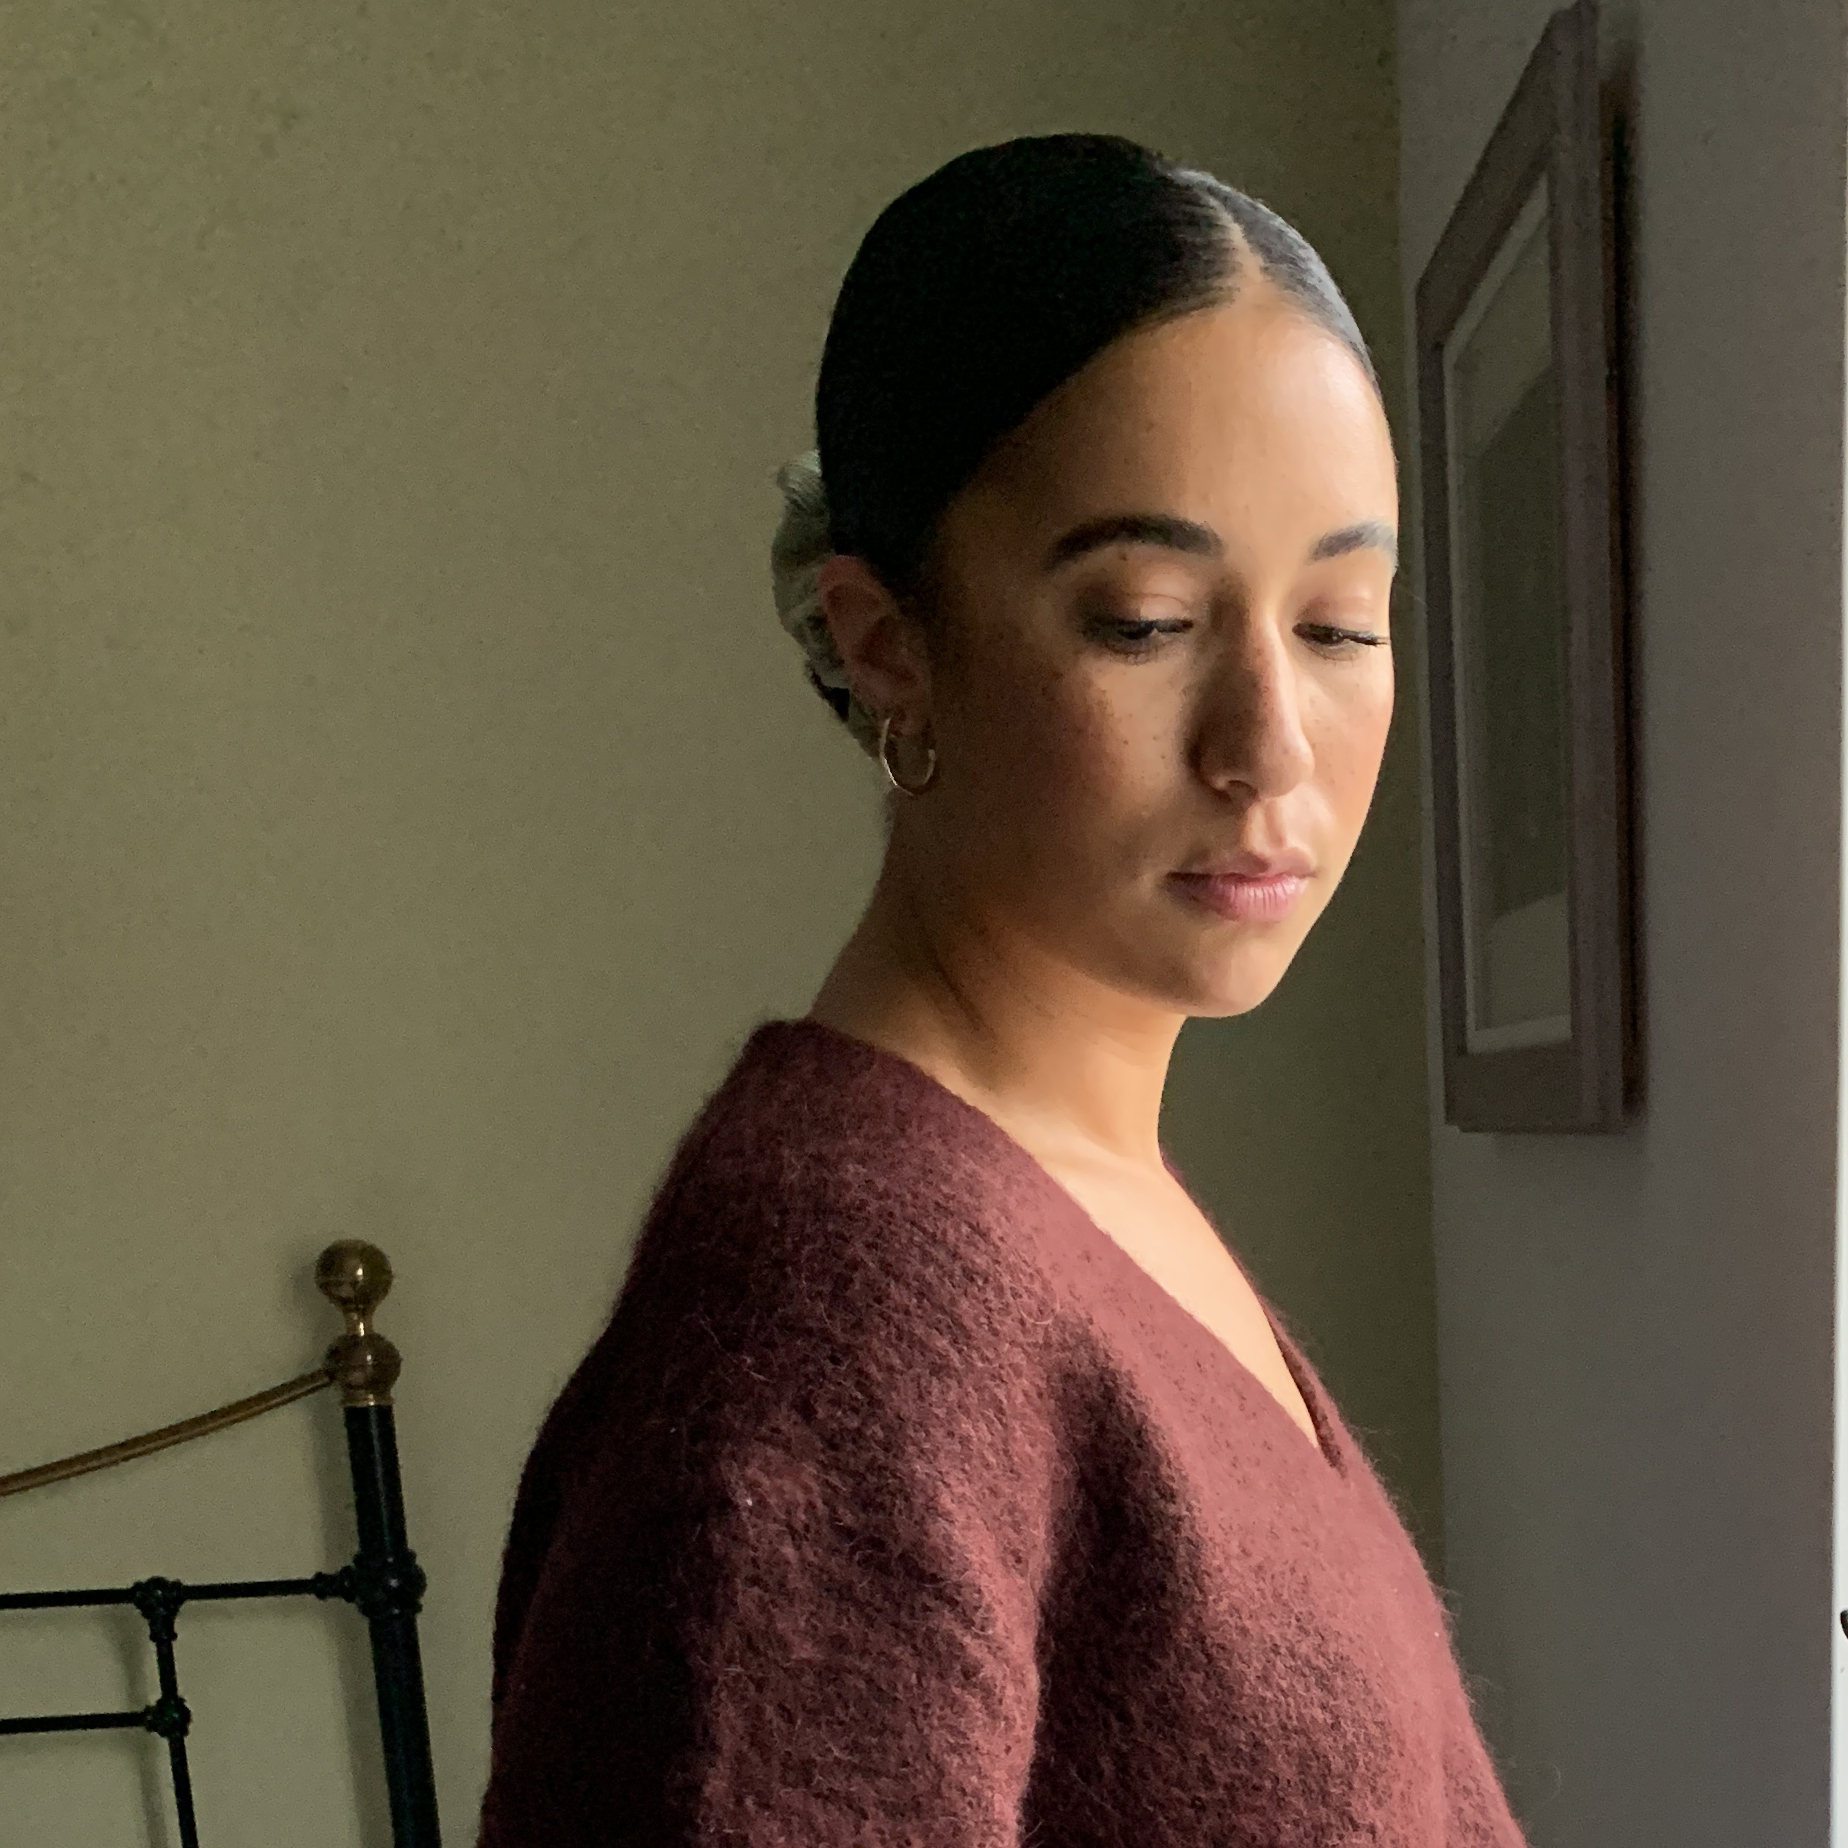
Either way, whether using a printed or digital reference, consider how much detail you want to replicate from your reference photo and choose the size of the grid accordingly.
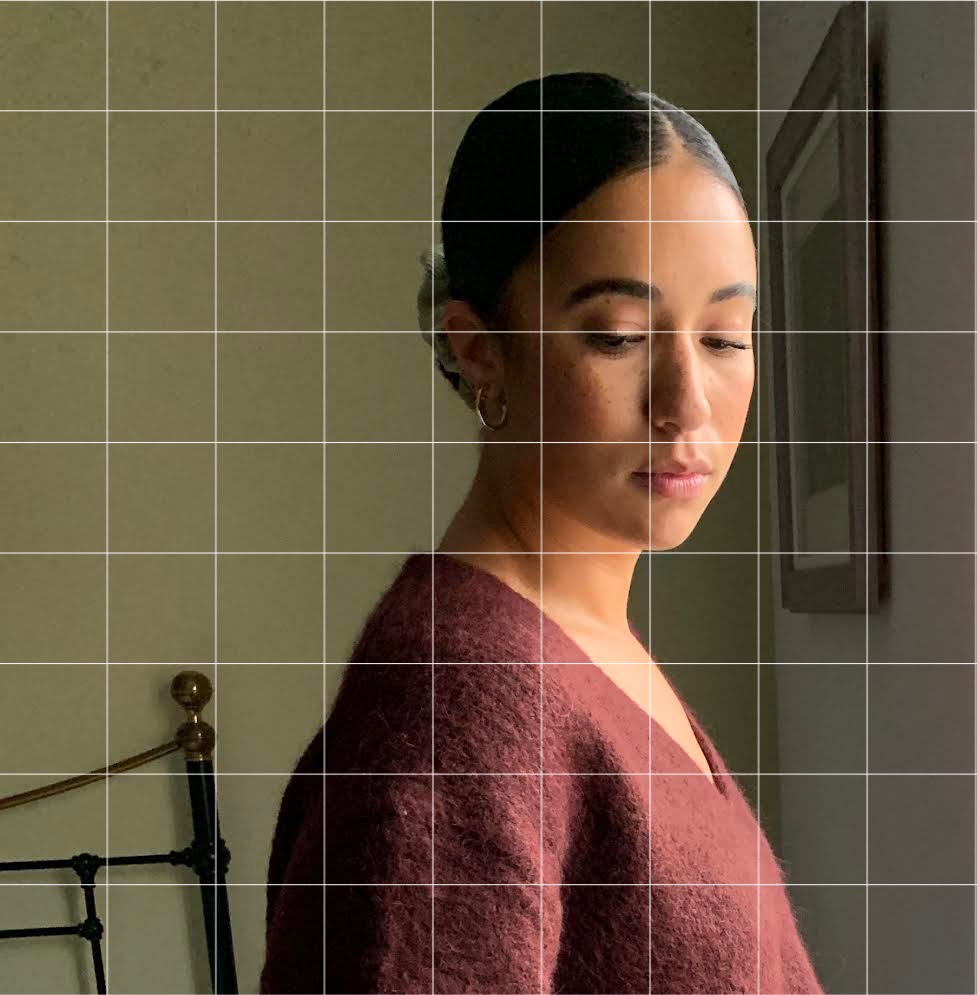
With the artwork I’ve included here, I chose a 9 x 9 grid, meaning I’ve divided the overall width and height of my paper into 9 equal measures. Using a calculator, it’s a lot quicker and easier to figure out. I then applied the same process and applied a 9 x 9 grid onto my digital reference image.
With a light touch, I use a pastel pencil to mark the grid lines onto my paper. I tend to use a Faber Castell 270 pencil which is a very light grey. I find it’s not too strong a colour on a dark surface and I like the subtlety of this brand. If I was using a light substrate, I would use Faber Castell 273 which is a mid-grey colour. Experiment and find what feels right for you. After all, there are no hard and fast rules about this (no pun intended)! Using the side of a ruler that’s longer than your paper, join the marked dots, top to bottom and side to side across the paper, and that’s it! You’re now ready to draw the image into the grid.
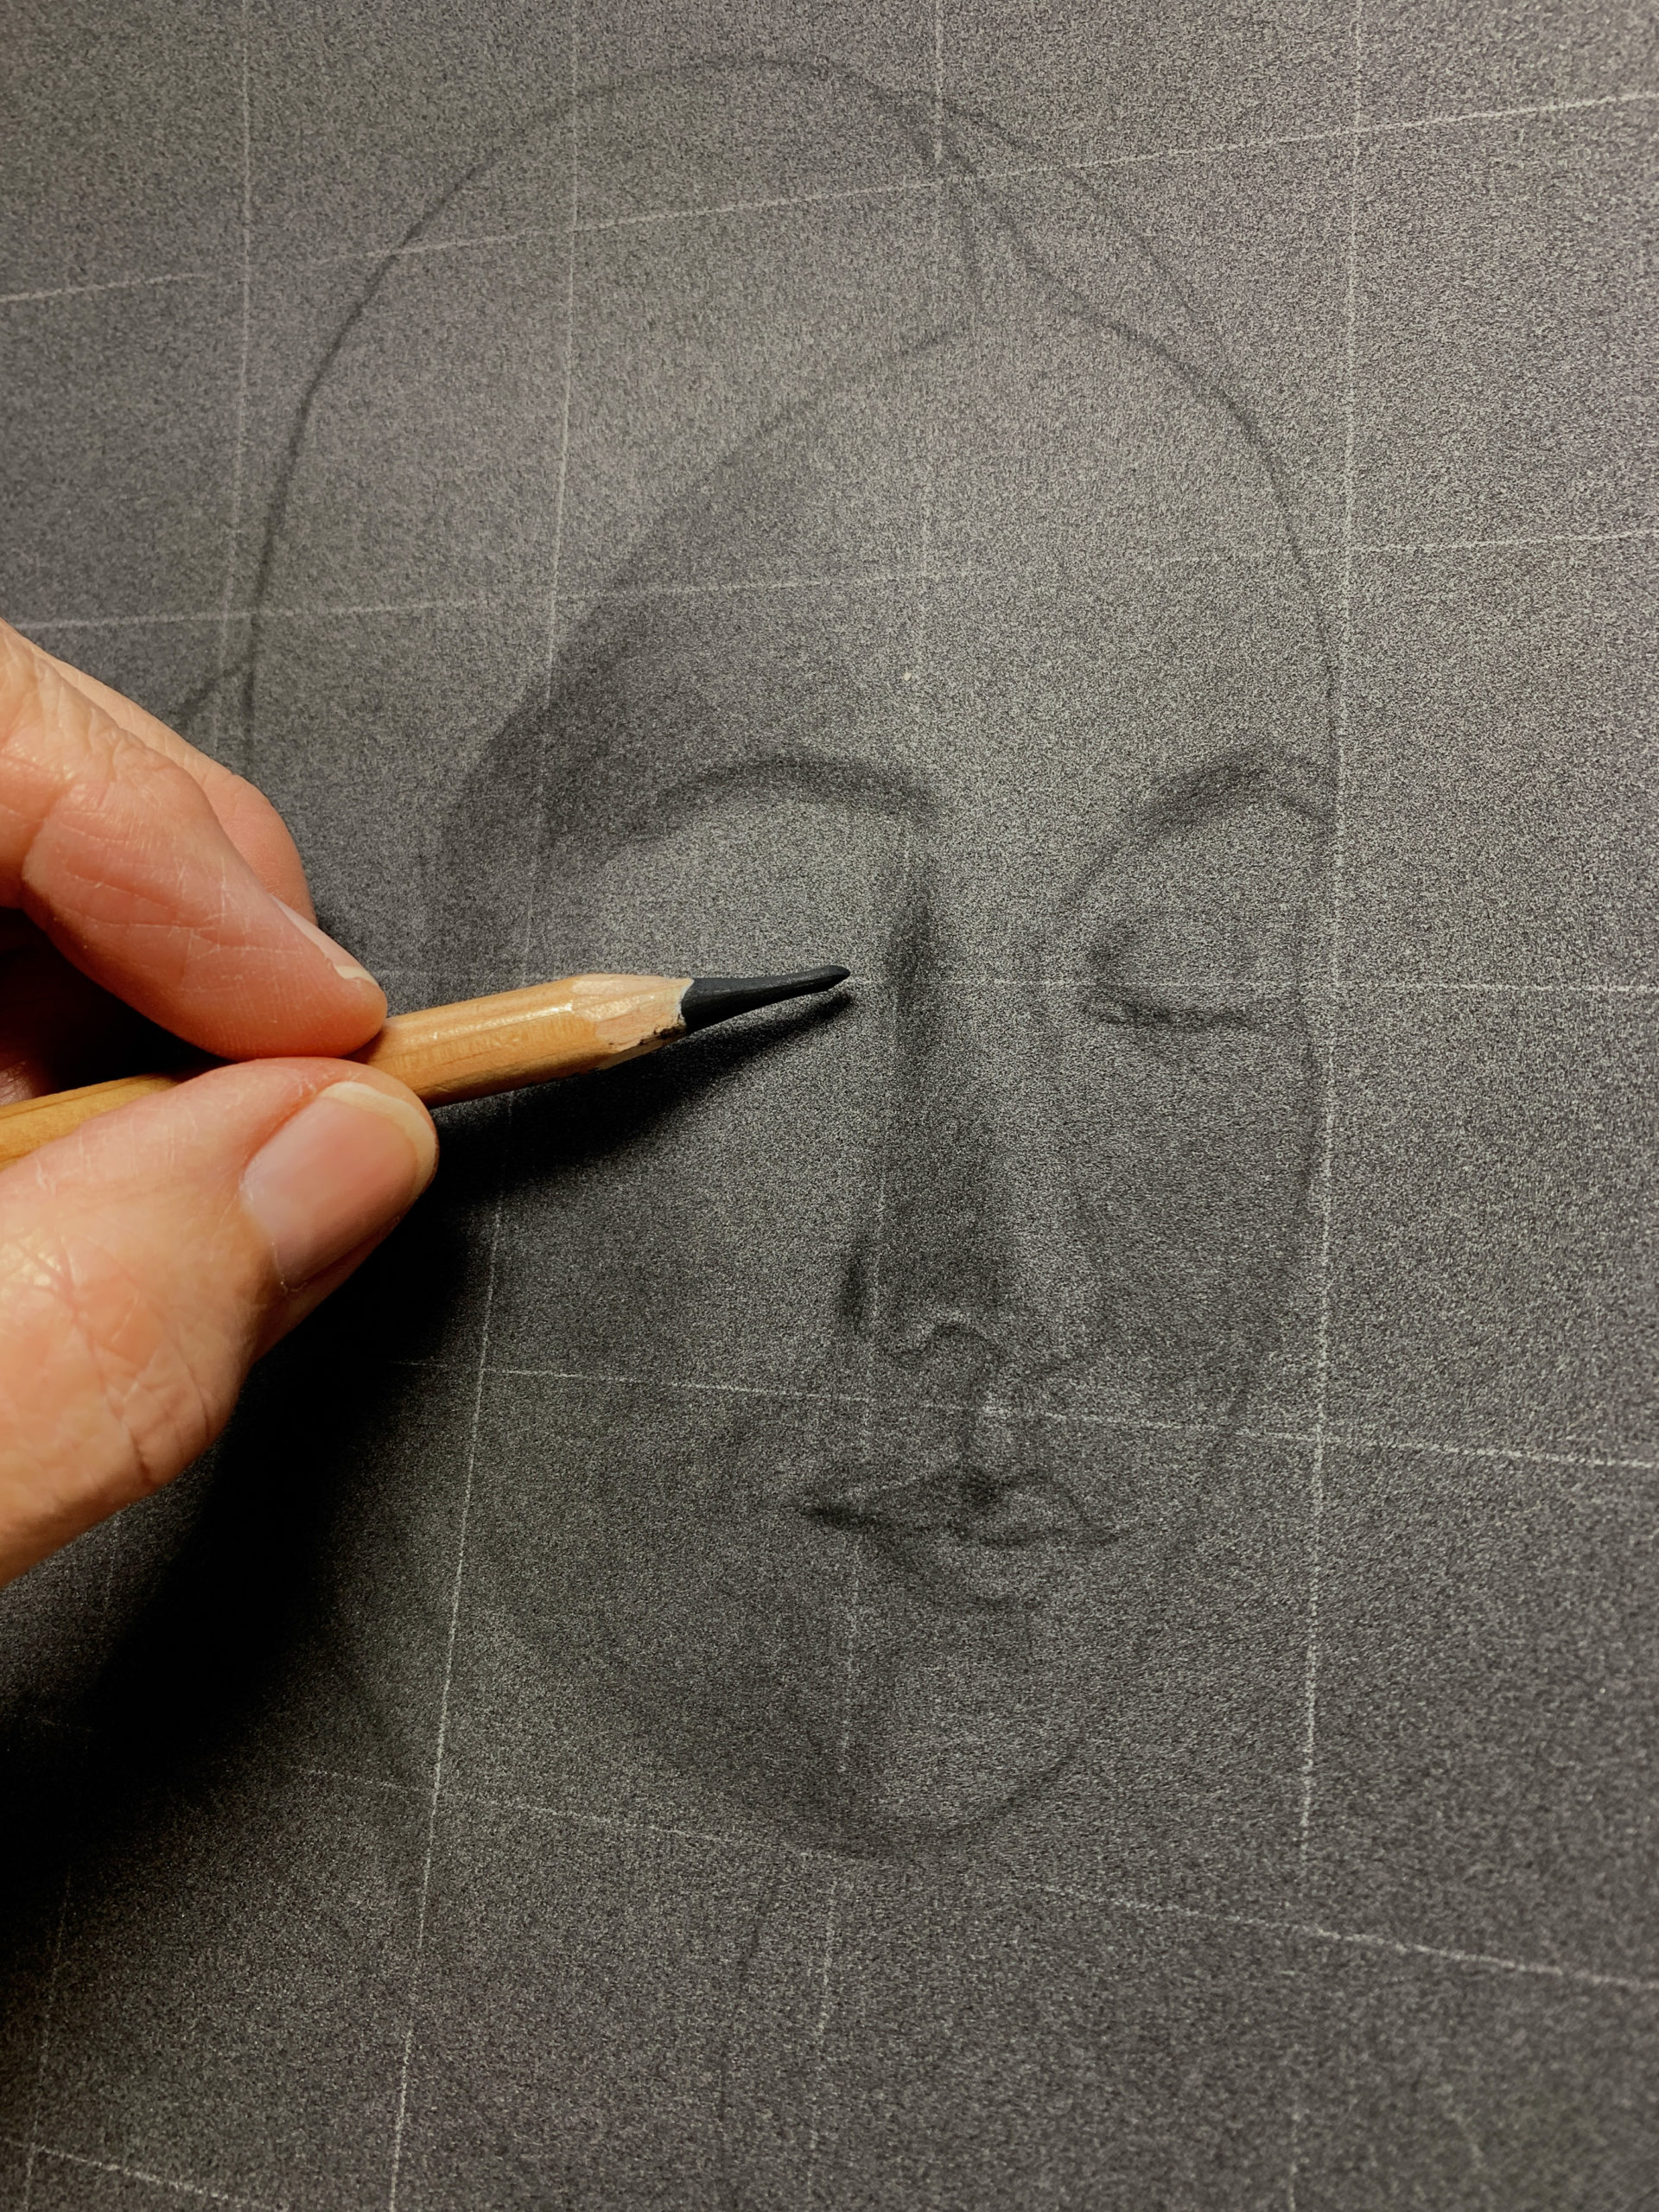
Do this by focusing on just one rectangle at a time, transferring all the elements from each rectangle on your reference image onto the equivalent rectangle of your gridded paper. Once all the areas are mapped out, you’ll have an accurate line copy that’s perfectly proportioned.
One of the best things about using the grid method is that you can accurately place your image as well as save time. As you use this approach regularly, you’lll start to improve your drawing skills as well as your handling of the medium and will notice how you naturally you start to draw more freehand.
Good luck – feel free to let us know how you get on!”

Thanks so much, Michele, for this easy-to-follow system!
________________________________________________________________________
Love reading Pastel Today?
Did you know that if you share this art newsletter, if three people subscribe using your unique link, you’ll have the opportunity to be featured in an upcoming newsletter that will reach thousands of subscribers? How fab is that?!

Join our community of ambassadors from all over the world and help spread the word about Pastel Today. It’s easy. Just click HERE to get your own unique link to share.
Invite your friends today and become a Pastel Today Ambassador!
And that’s it for this time!
Gail
PS. Did you catch the article all about Michele Ashby’s awesome spiral staircase paintings?

